
While you can’t become a living, breathing anime character (although I imagine some of you would love to), you can at least up your cosplay game with this make up tutorial to help live out your anime dreams.

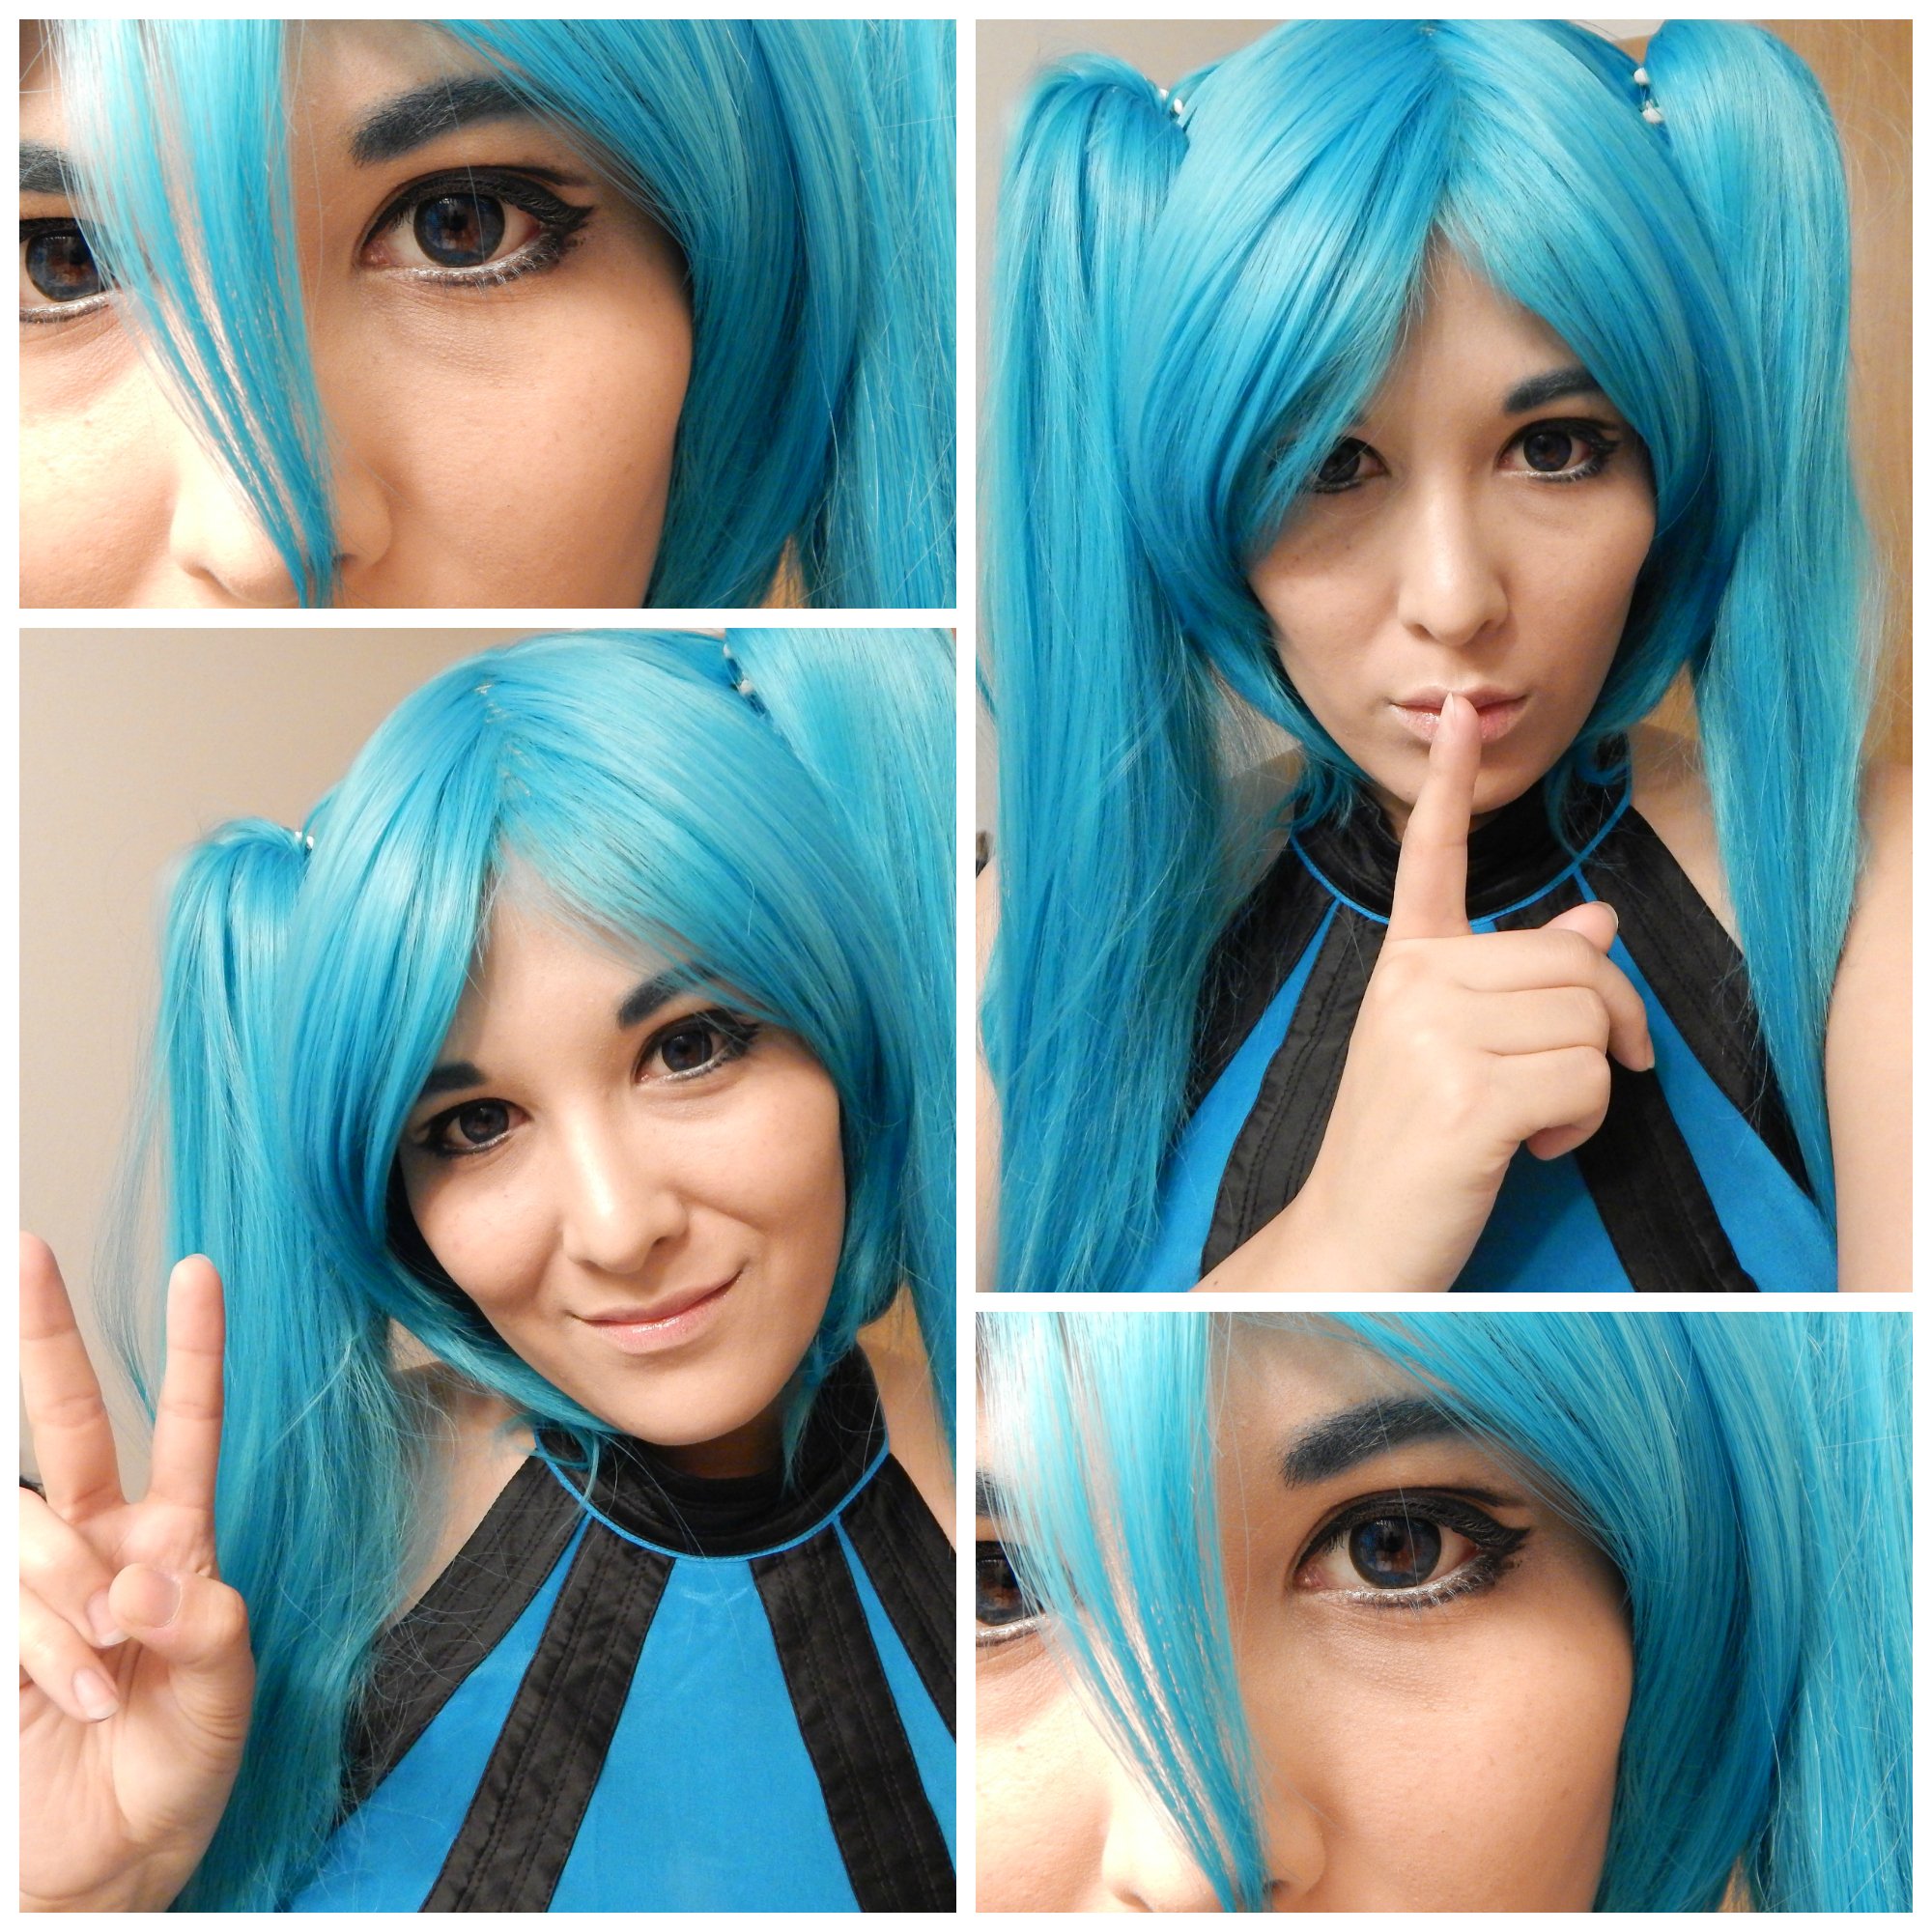
Before & After
Besides the very obvious change in my clothes and hair, you can see how this make up tutorial will help achieve a flawless complexion, enlarged eyes, and the perfect nude lip. In this tutorial, I’ll also note some variations you can do if you’re portraying a male, since I decided to go for a more feminine look.

Face
1. Simply put, cover your whole face with a smooth foundation matching your skin tone. You can also opt for a shade lighter if you want a slightly paler complexion. Ignore your eyelids, but be sure to cover your eyebrows. You’ll also want to cover your lips if you plan to put make up on your lips like I did. But keep in mind to use some lip balm before applying, otherwise your lips will get very dried out.
2. Using a shaded or translucent powder, blend in the foundation to help make it look less heavy.

Eyelids and Eyebrows
3. Smooth on an eye primer and, if you like, cover your whole eyelid in a neutral, matte shade. I opted not to because my primer is slightly tinted.
Optional: Insert some colored contact lenses of your choosing. If you plan to wear a wig or dye your hair a different color, you’ll probably want your eyebrows to match the color. Using eye shadow or pigments, apply color to your brows with a brush by patting the color on instead of sweeping it on. If you want a more intense color, use a glue stick on your eyebrows to flatten the hairs and cover your eyebrows with concealer before coloring.
Eyes
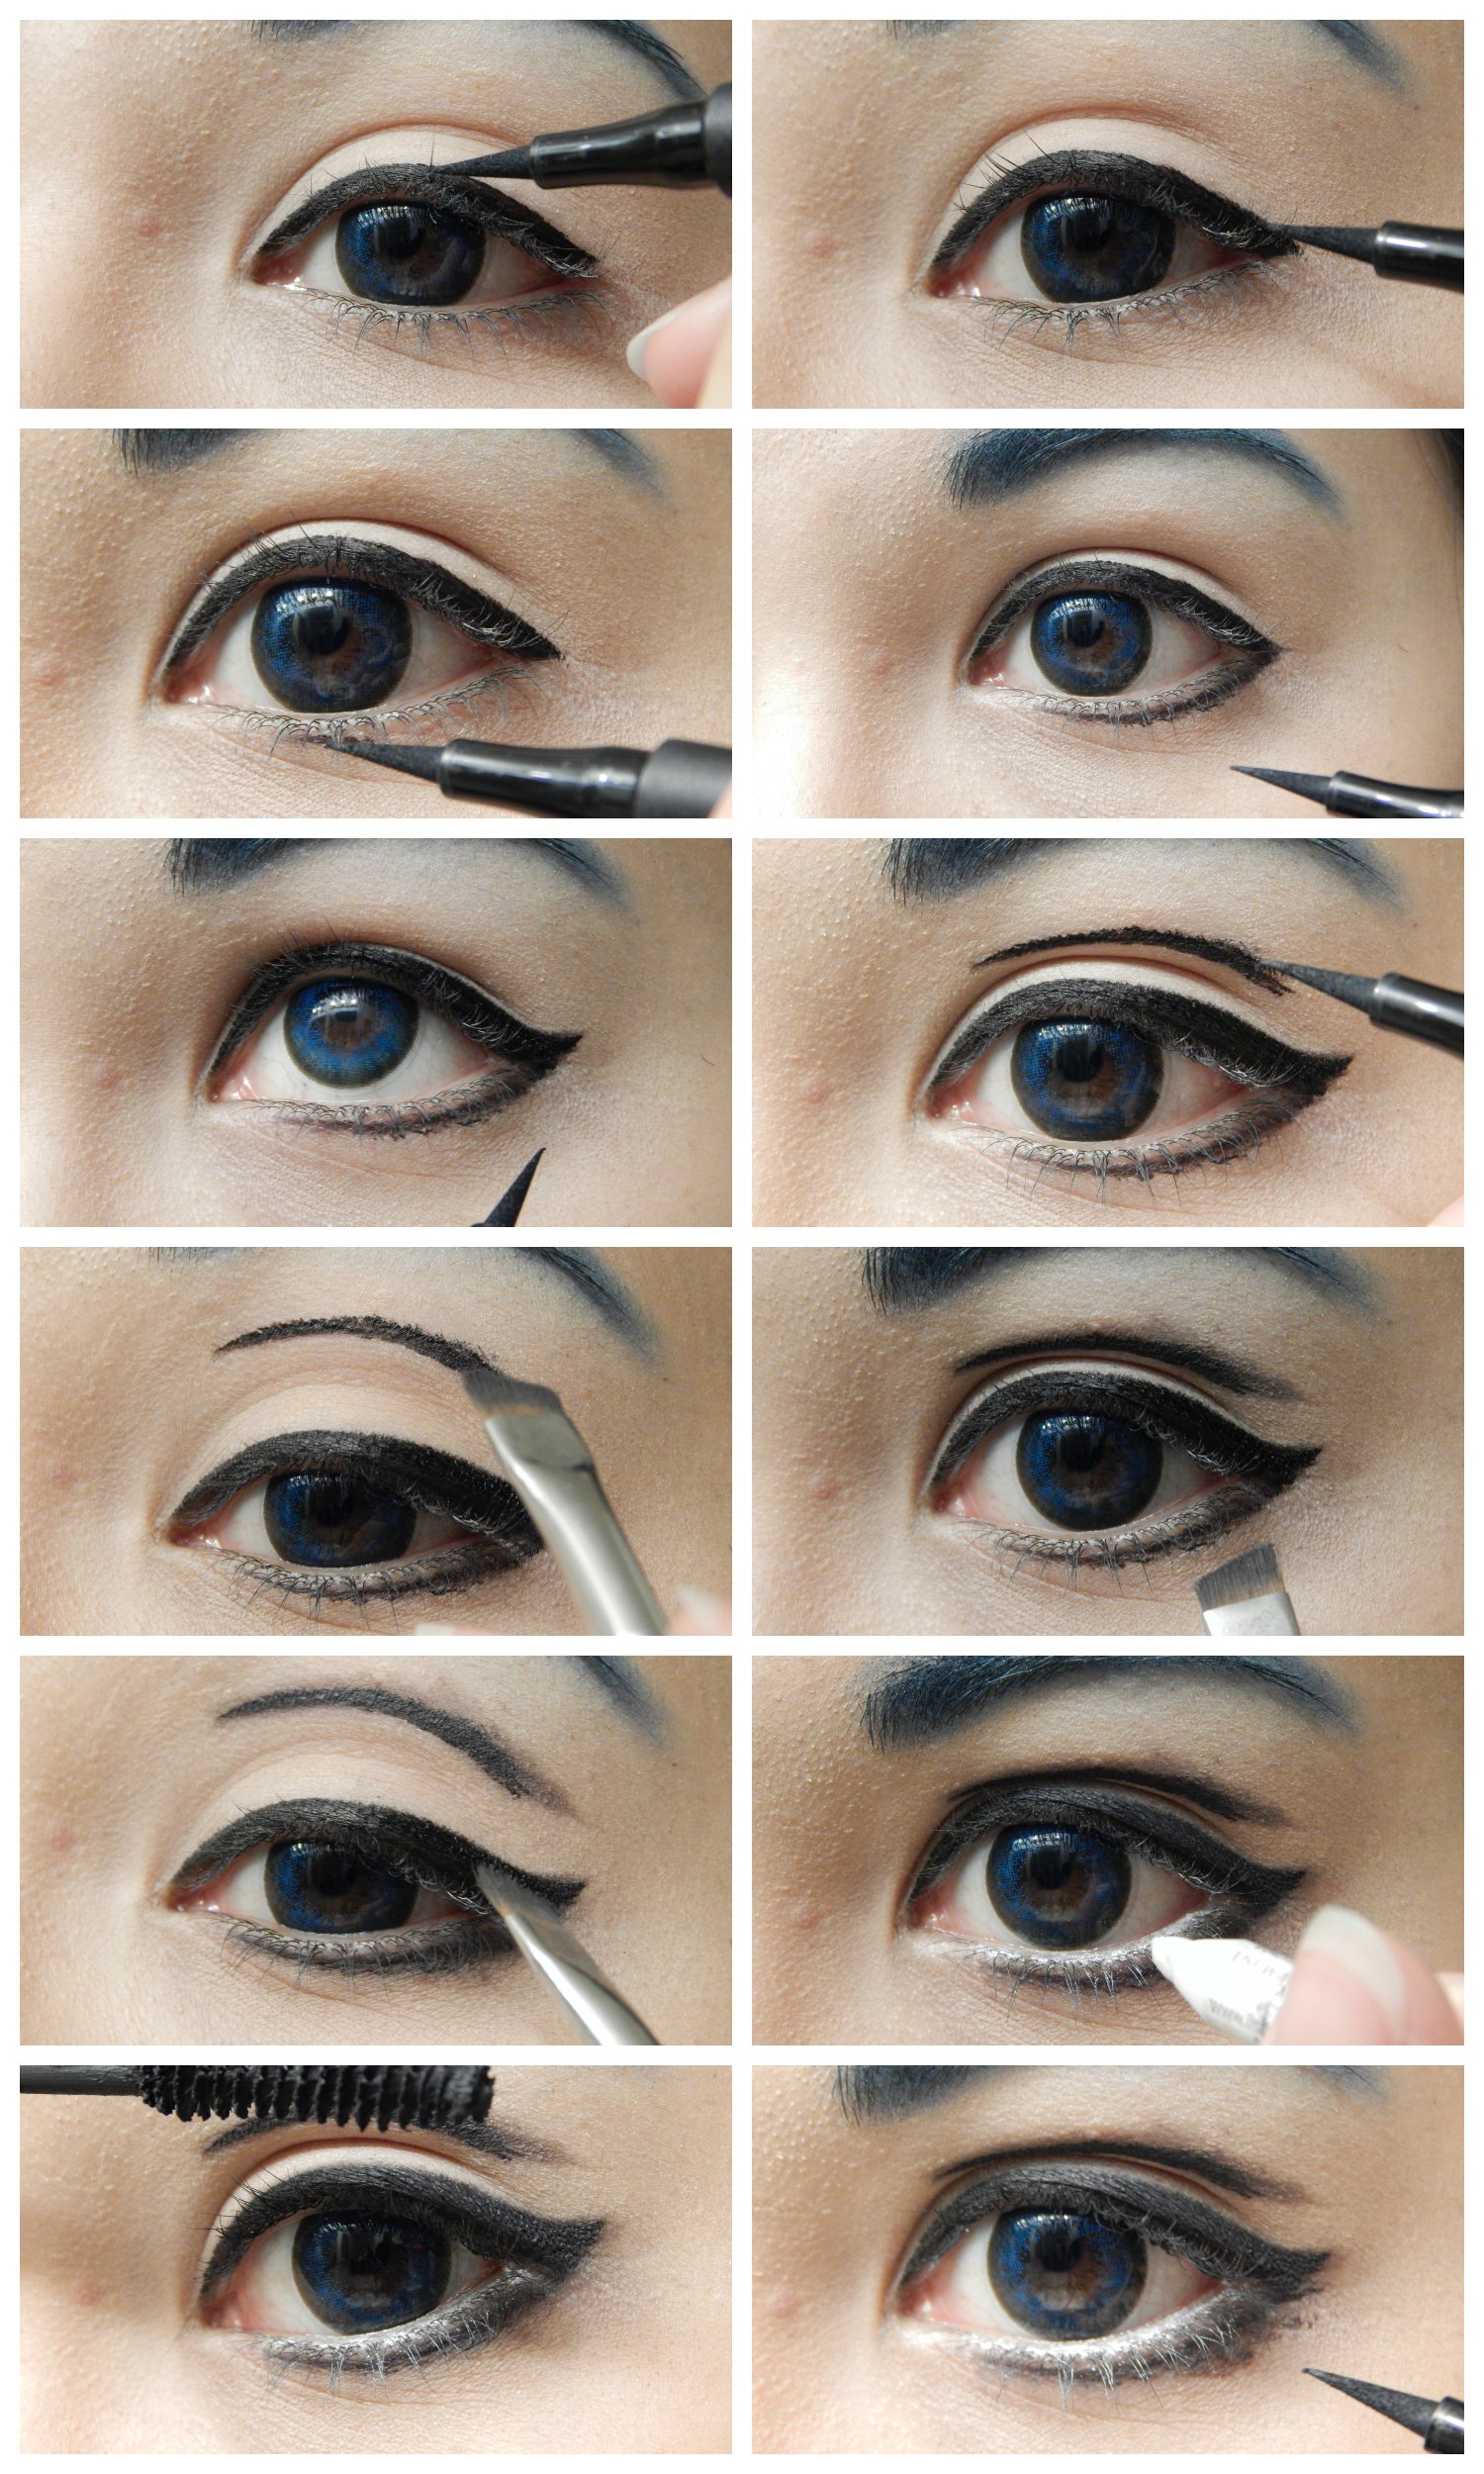
4. Using a liquid liner (My preference is in a pen form), line your top lid. When you reach the outside of your lid, run a short line straight out from the corner of your eye and fill in to match the liner on your top lid.
5. For your bottom lid, you can line a little lower than your lash line, like I did. You can also square it off instead for an edgy, more masculine look. Because I wanted this look to be more feminine, I also added a flick to the outside corner of my eye.
6. Look at your eye when it’s open and draw a line to emulate that curvature slightly above where your eye creases.
7. Using a dark eye shadow, brush along all of your lines to help soften the edges.
8. Taking a white pencil, line your lower waterline and fill in any empty space you left between your waterline and the line you drew on your lower lid.
Optional: Add stress lines, mascara, or eyelashes like I did along my bottom line. You can also apply false lashes to your top and/or bottom lid. If you plan to use them on your bottom lid, be sure to place them along the new lower lid line you’ve created and not your actual lash line, otherwise you will lose the illusion you’ve created.
Mouth
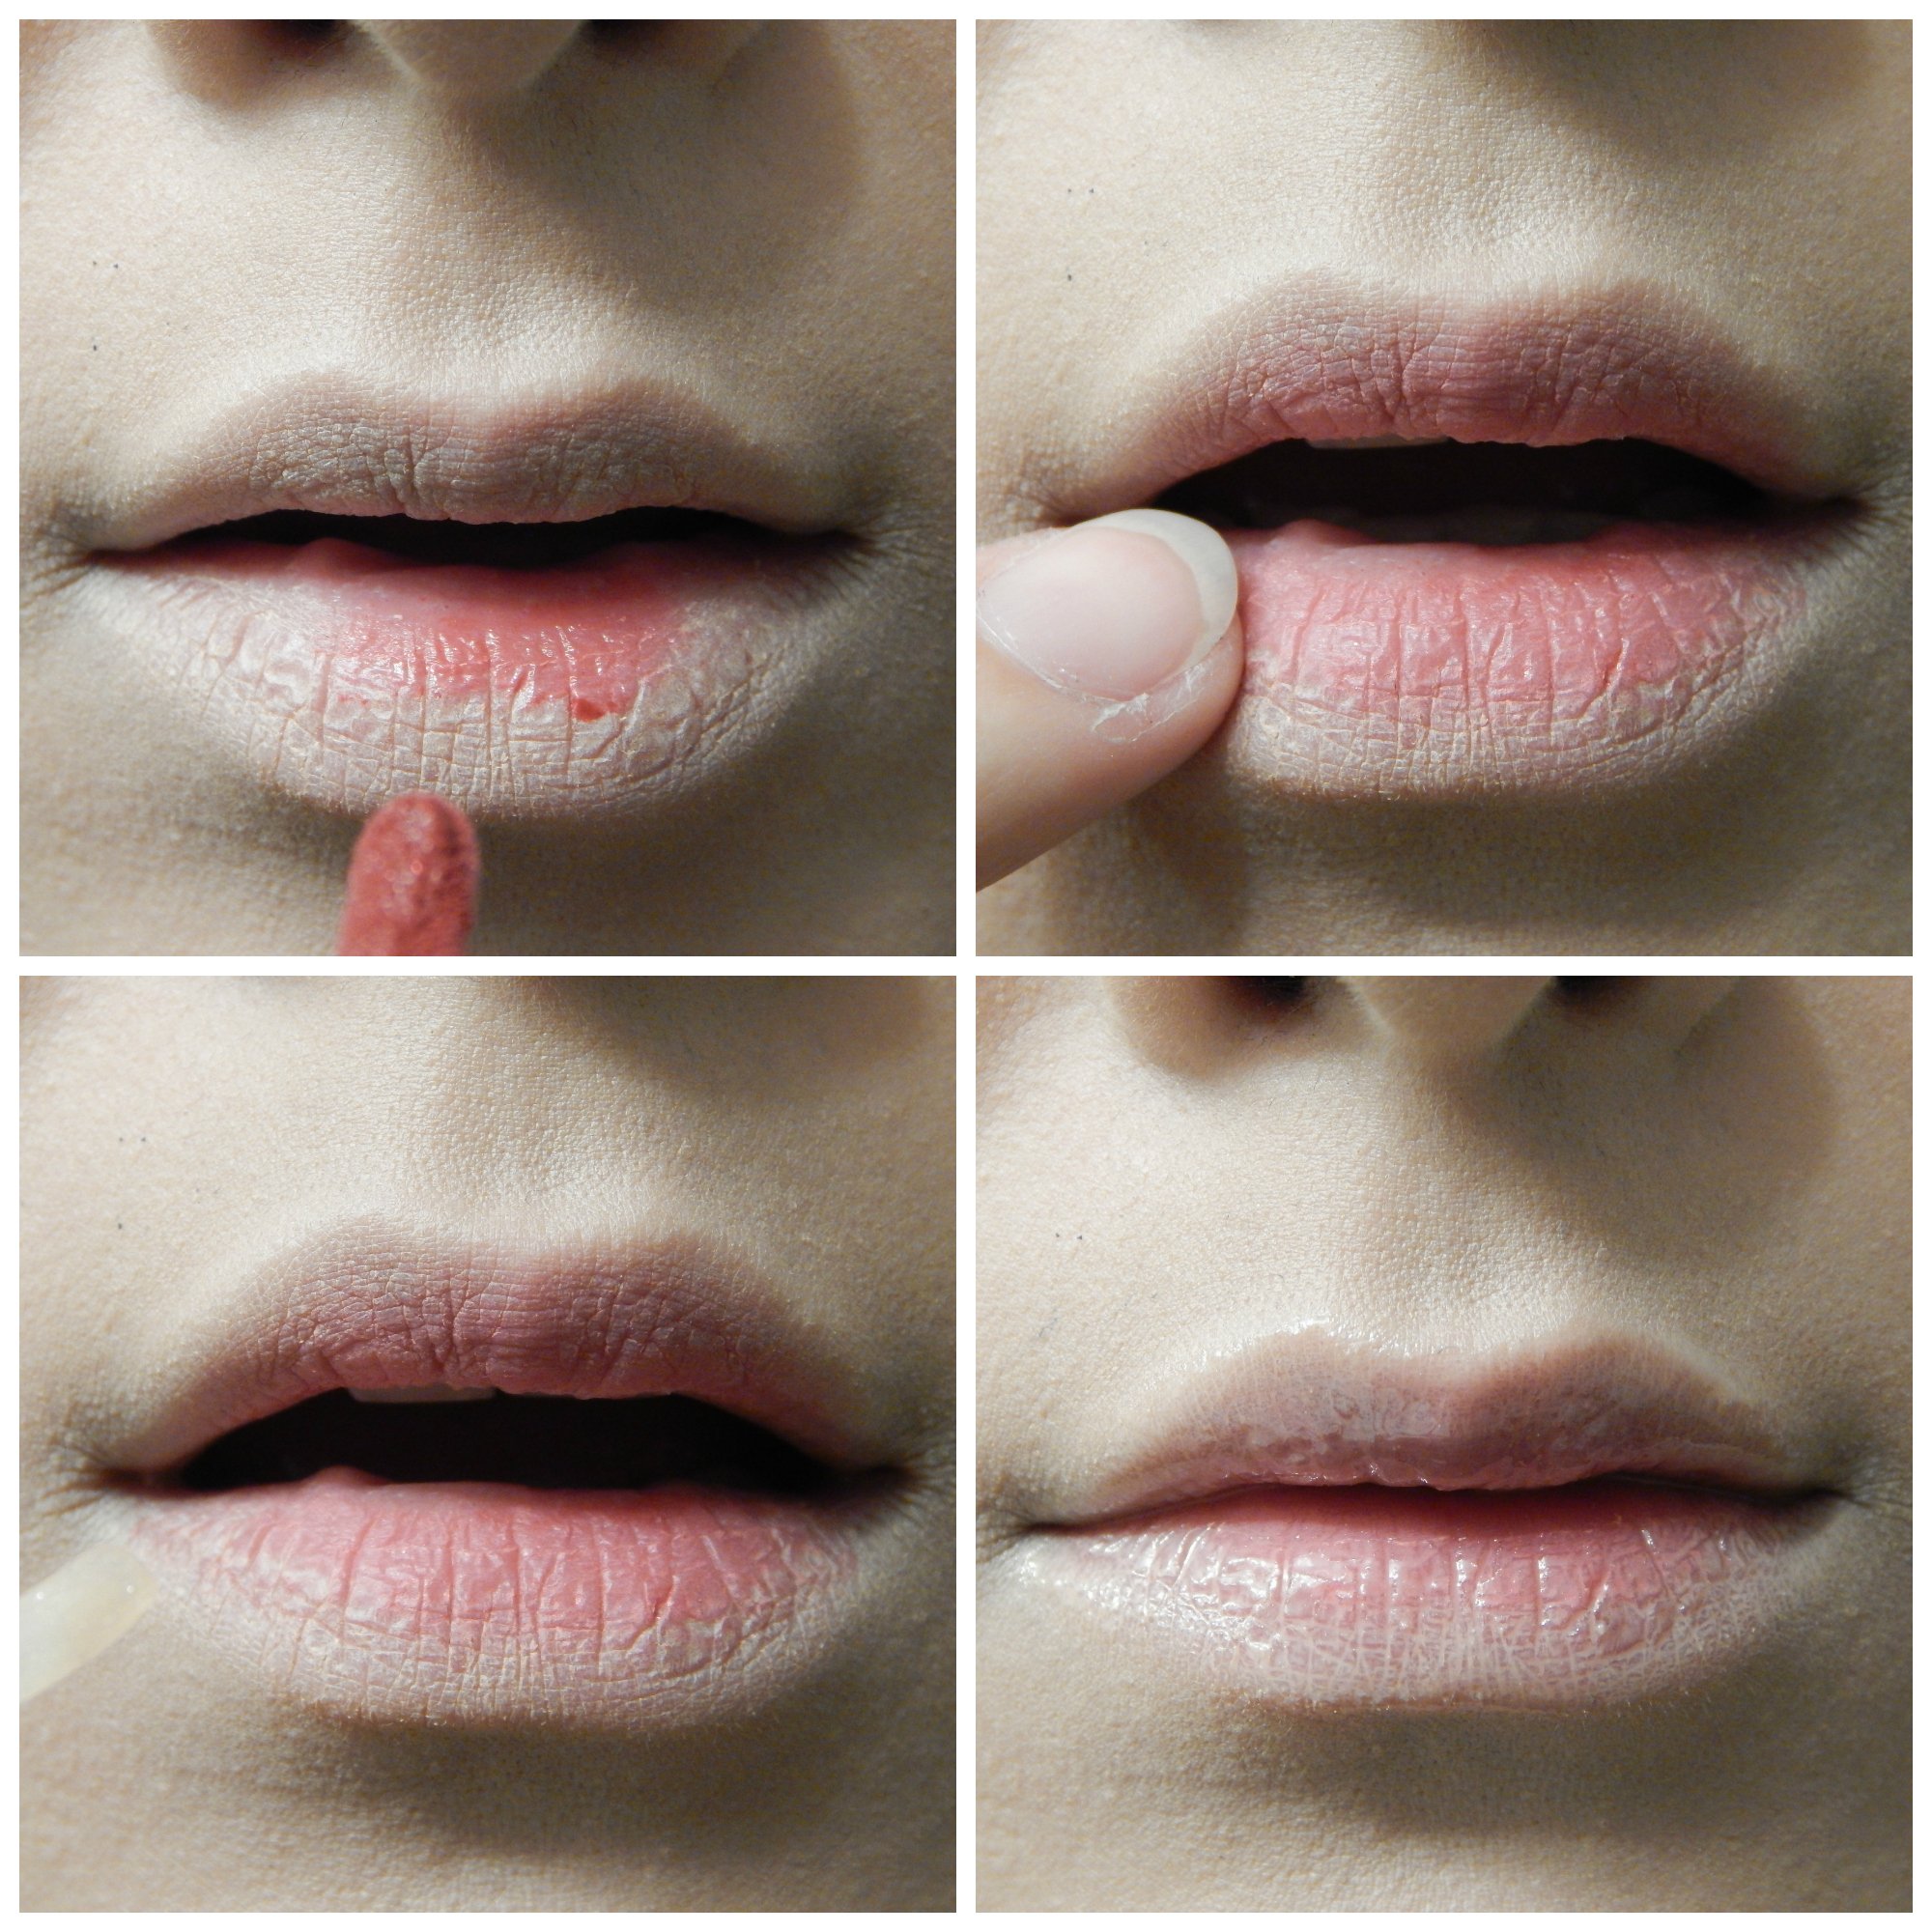
9. This is entirely optional and only necessary if you chose to put foundation on your lips in the beginning. Using a liquid lipstick, dab it only on the centre of your lips closest to your mouth. Use your finger or a q-tip to blend it outwards a little bit, being sure to leave the outer edges of your lips alone. Coat your lips with a thick, shiny gloss and you’re done!
Finale
Thank you so much for joining me on my second tutorial. We’ve got one more left before Hallowe’en and I can’t wait to share it with you.