BlizzCon has come and gone for another year, and I’m always impressed with the cosplay game at this event. This event boasts some of the best cosplay in North America, in my humble opinion, and also plays home to some of the best cosplayers. Always one of my favorites is the very spunky, and very sexy Jessica Nigri.
Recently, Jessica Nigri has taken it upon herself to show that she’s a talented and skilled cosplayer who isn’t always just picking characters that flaunt her assets. And her efforts in making her fanbase proud have not gone unrecognized. At this year’s BlizzCon, she came out strutting in a Deathwing costume designed by artist Zach Fischer.
Following BlizzCon shortly after, Jessica released a video on her YouTube channel showing how she gave this masterpiece life in a very short two weeks. Needless to say, that timeline is not for the faint at heart for such an elaborate cosplay. But the best part of the video, besides her random moans and grunts in the voice over, is how she gave us a glimpse into some of what she uses to build her cosplays and the techniques she shares.
And it turns out a lot of what she does, I do, too. So I thought, “Why not show some of the supplies she used for her build and talk about some of the properties of them and why she would use them?” Great thinking, J. Tanooki!

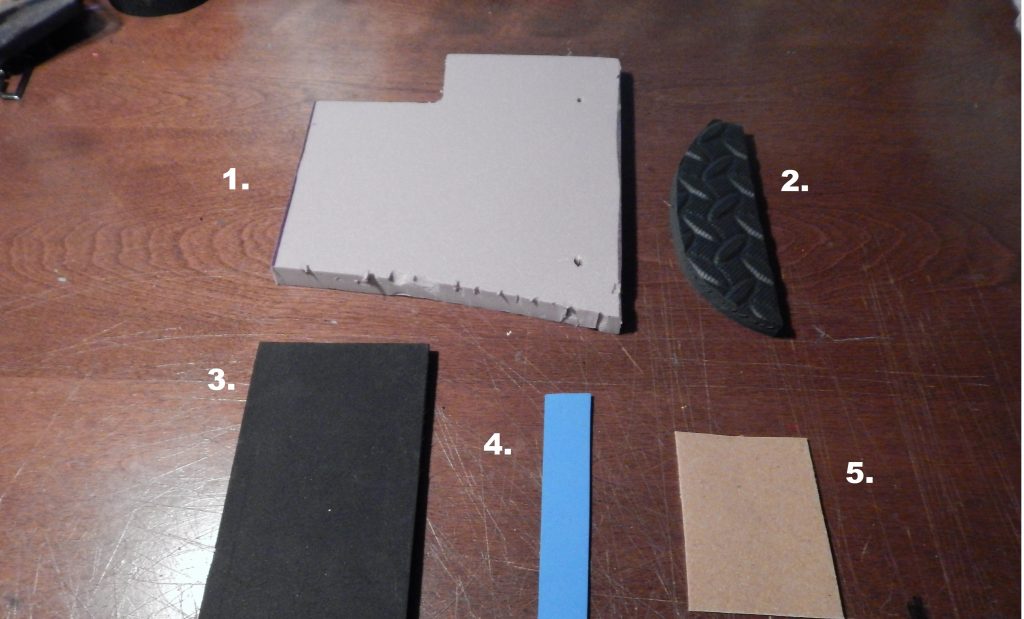
So let’s dissect some of what she used to make her armor. We’ve got:
- Rigid Insulation
- EVA Foam
- Craft Foam (1/4″ thick)
- Craft Foam (1/16″ thick)
- Worbla

1. Rigid Insulation
In the video, this is glued together in layers to make a thick block, then sanded and shaped into horns. Really, there isn’t much to say about this foam. It’s rigid, so it’s good for sculpting pieces that cannot be flexible. It’s also incredibly light weight. I personally find this to be the most ideal for making props, especially something with an especially large end like a hammer. Anything to take some weight off of something you’re carrying around all day makes for a better cosplay experience.
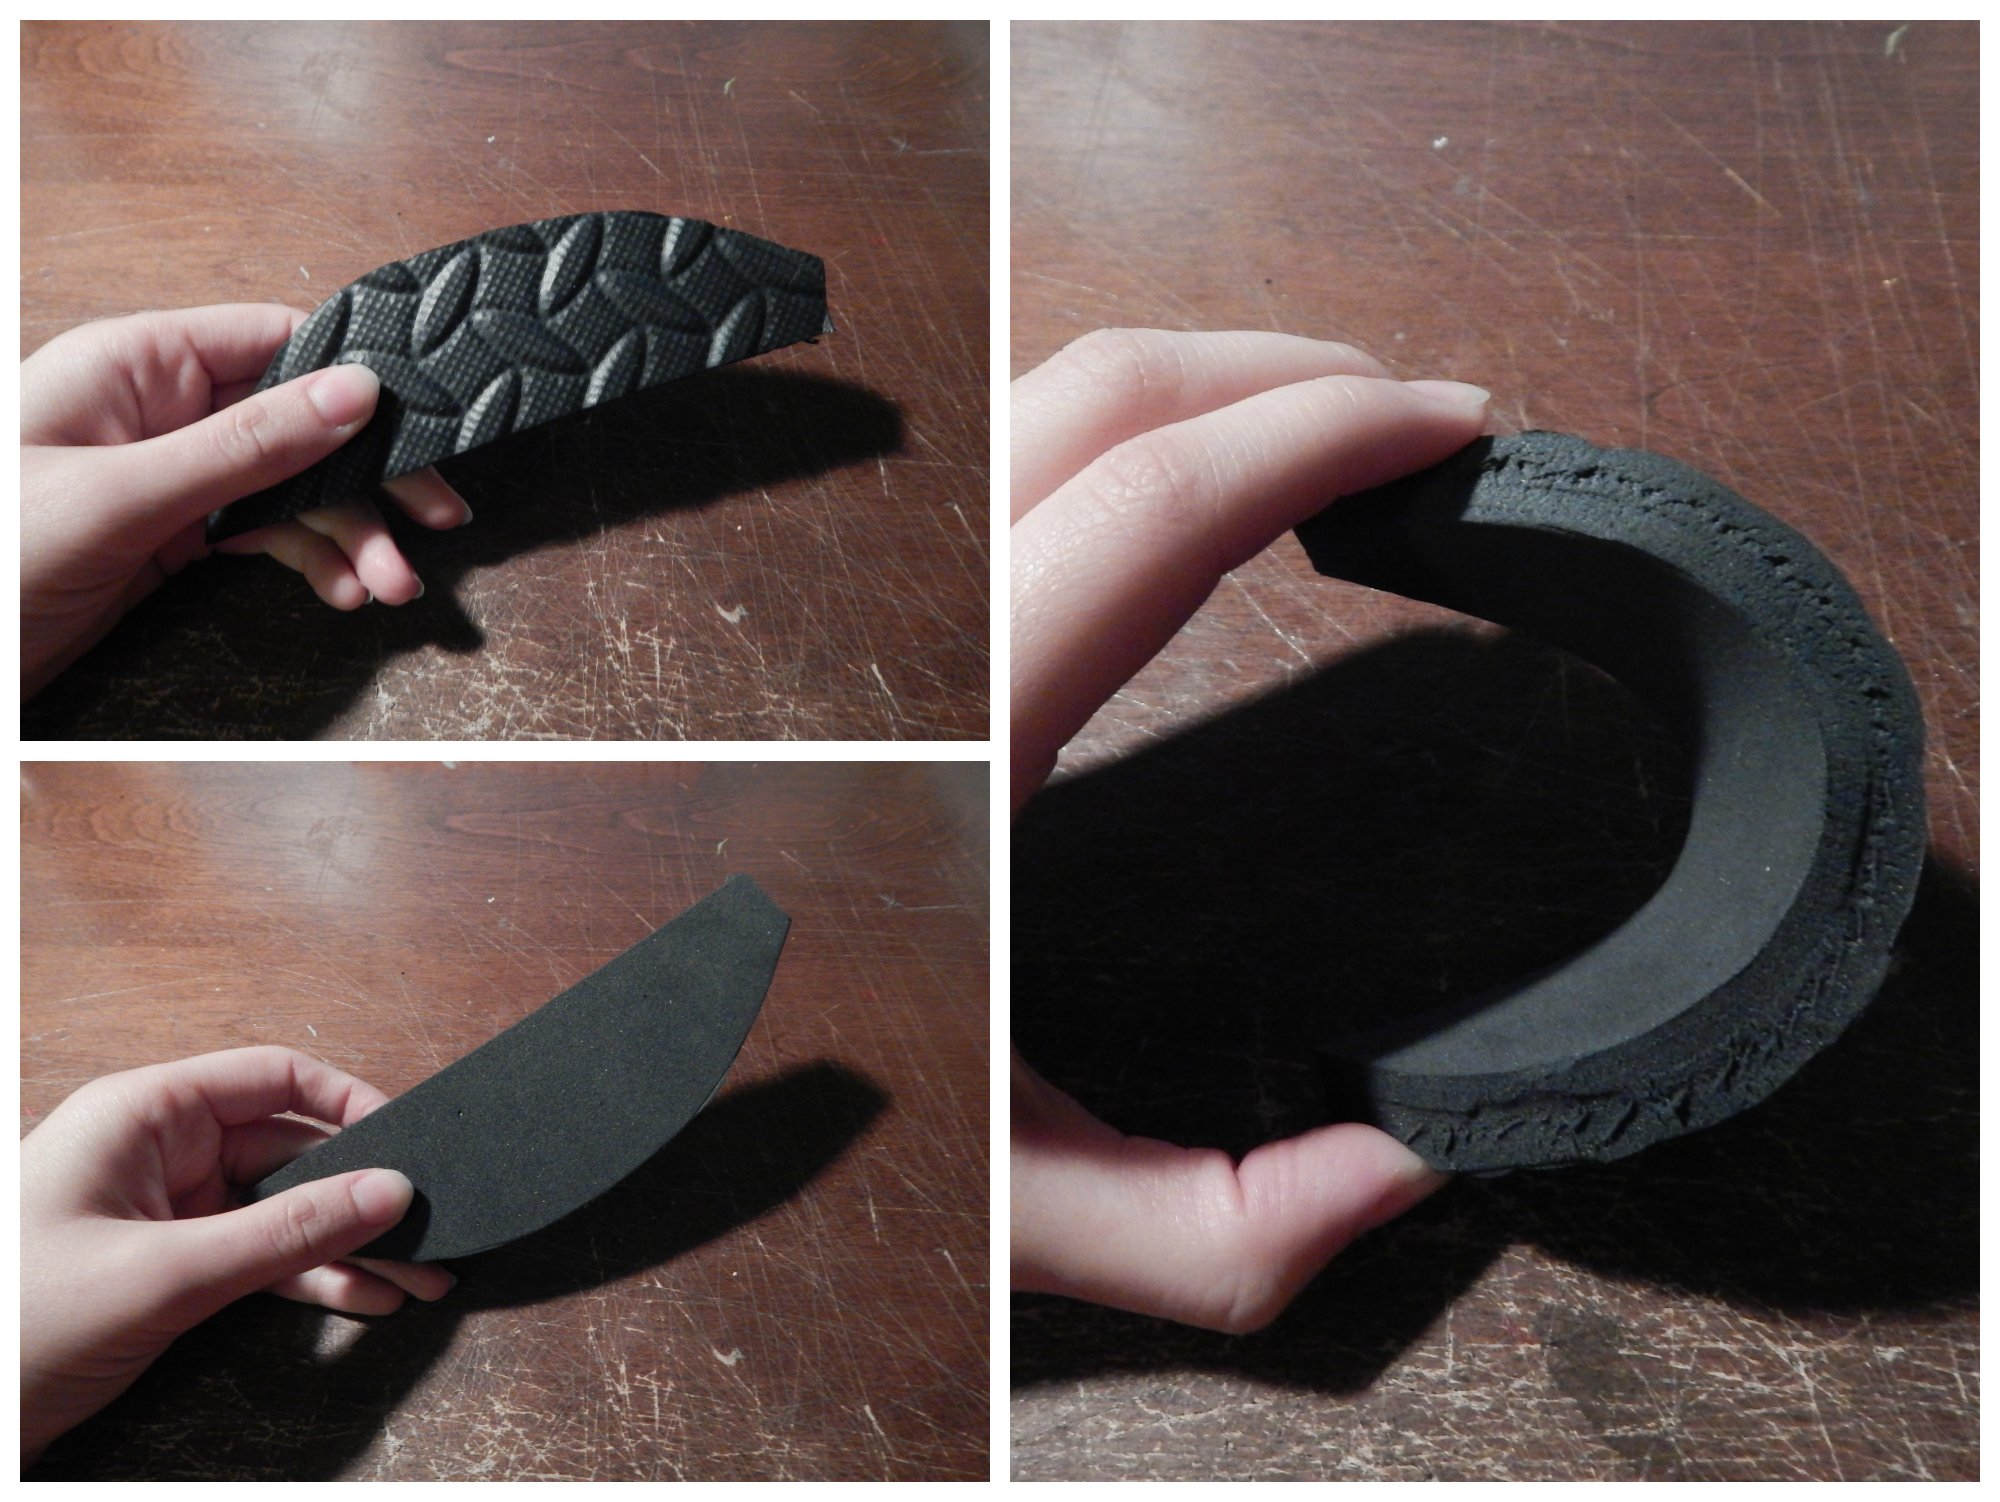
2. EVA Foam
The go-to for all your armor building needs. This awesome foam is thick and durable, but also lightweight, flexible, easy to cut, and can be shaped with heat. The most common source of this foam is in the form of floor tiles used for playroom and workout rooms. It’s also relatively cheap at around $12 CDN for 16 sq. ft of material.

3. & 4. Craft Foam (1/4″ & 1/16″ thick)
Craft foam, I find, is perfect for large and small detail work or when you need armor components made out of foam, but you don’t want them as thick as EVA. Both are also just as or more flexible than EVA foam, respective to the thickness. You can find either of these thicknesses at any craft store, but generally in smaller sheets than the EVA. For the size of sheet, it can be more expensive than using EVA, but when you consider the convenience for thin details and being able to cut pieces with a standard pair of scissors, it’s worth it.
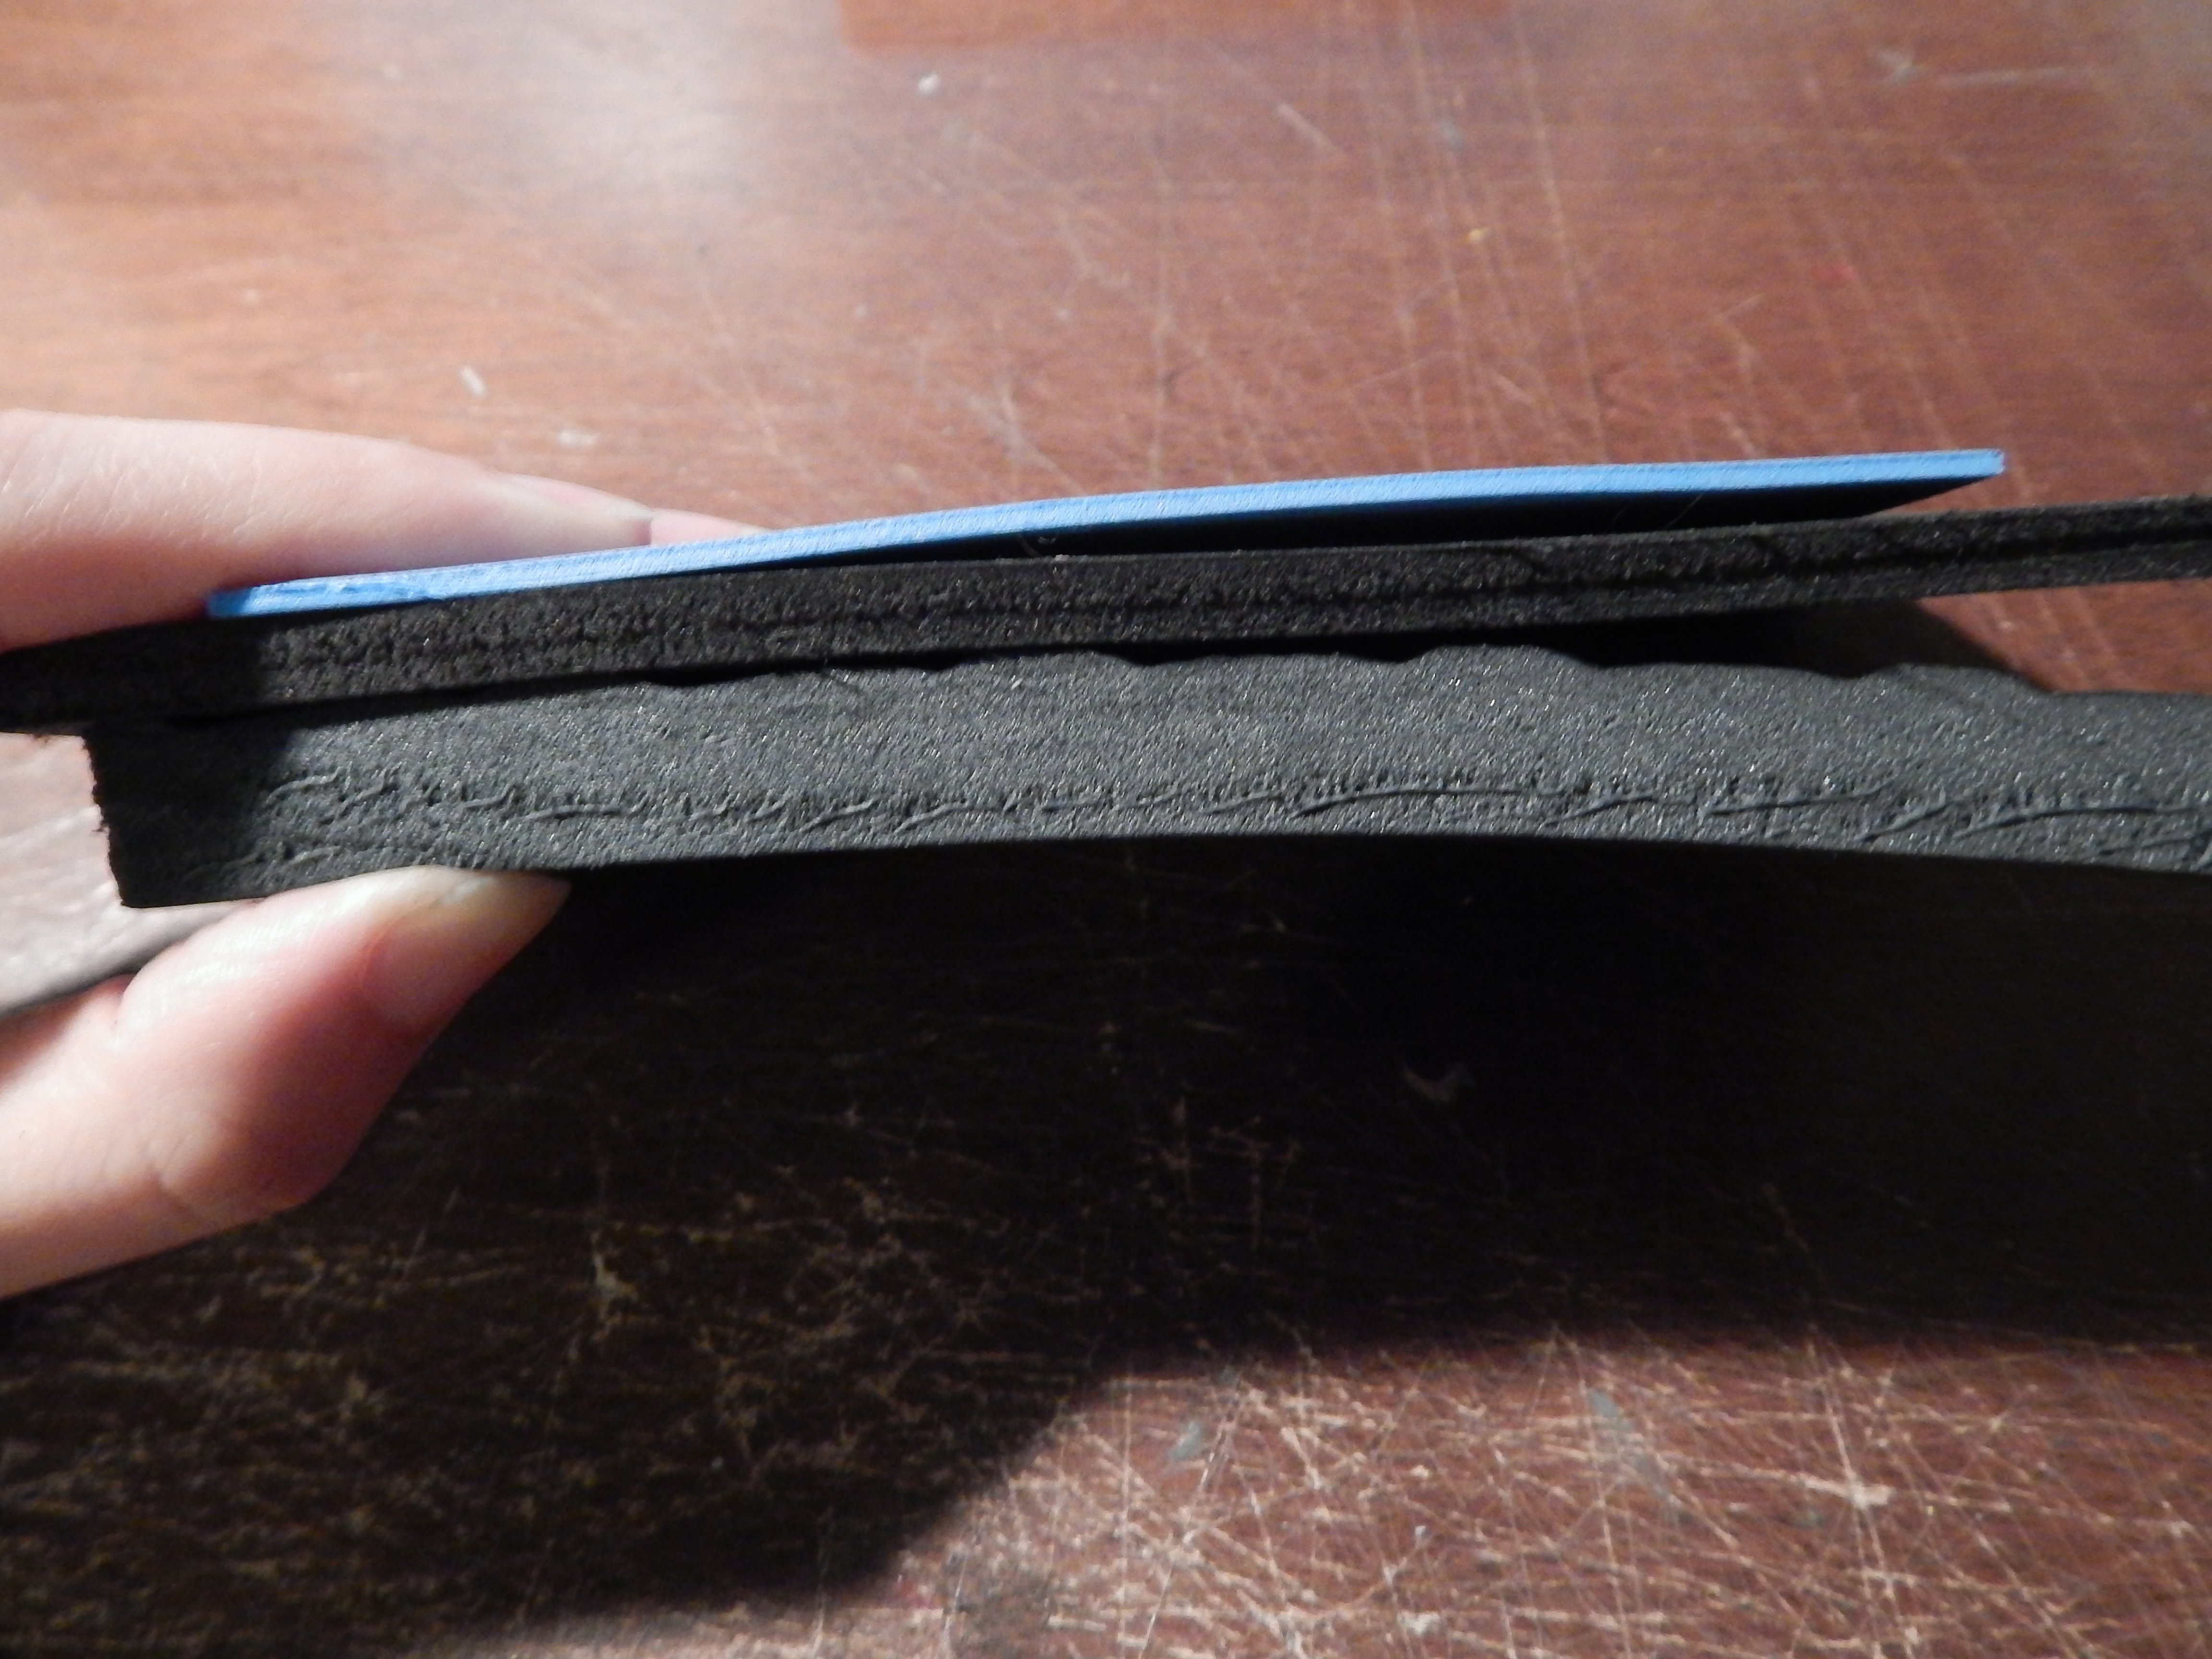
Here you can see a side-by-side comparison of the thickness differences between EVA and the craft foams.
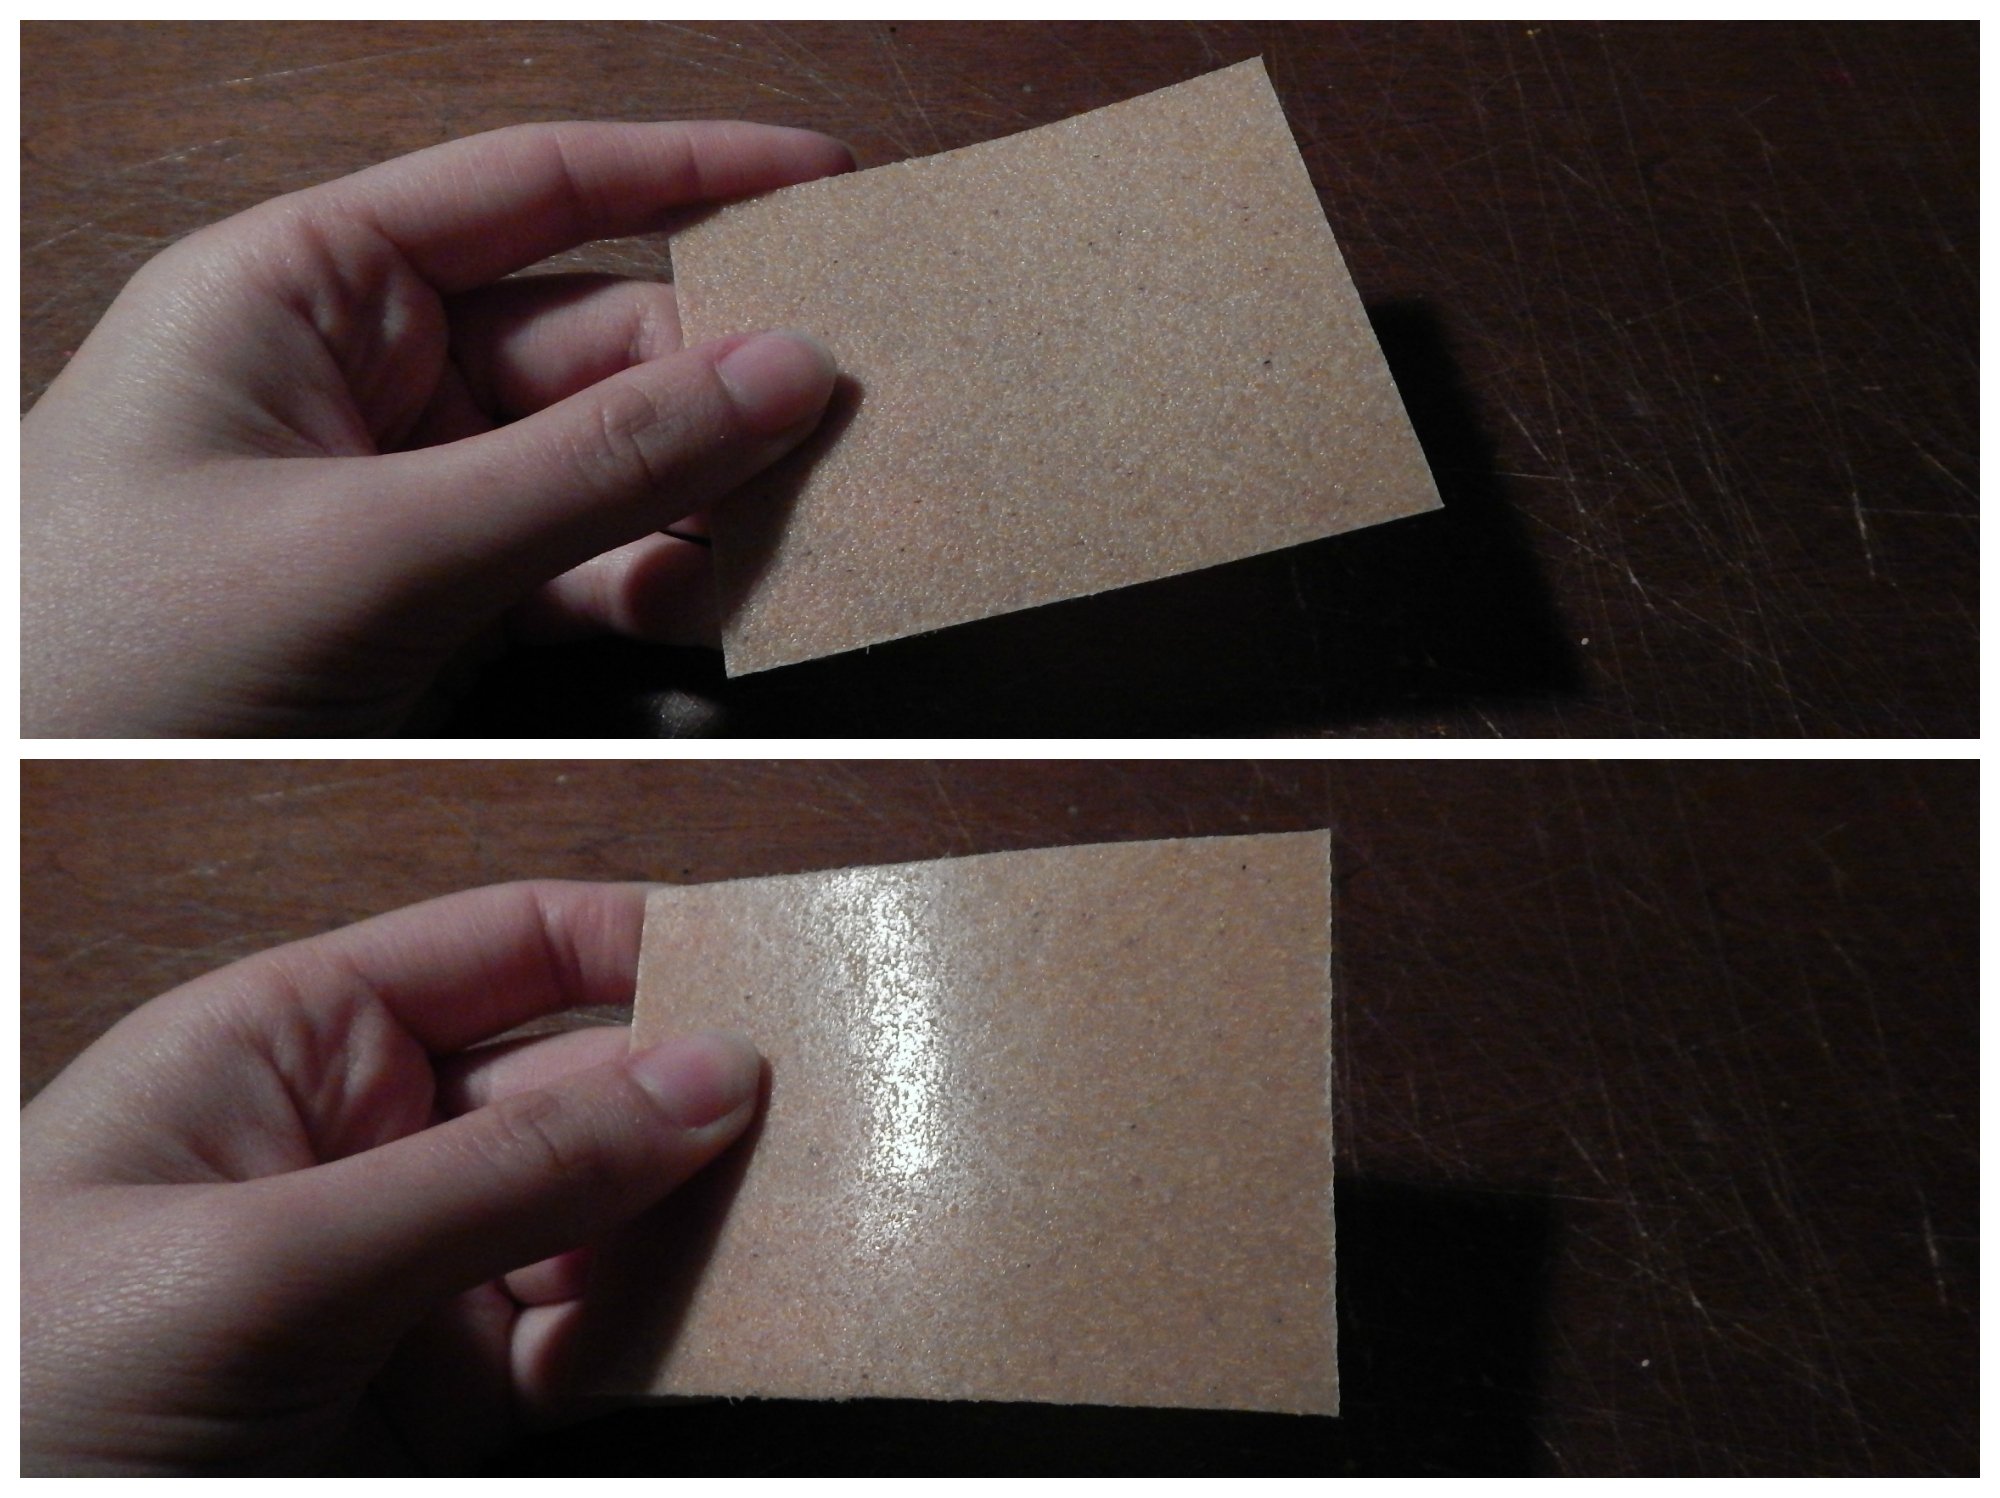
5. Worbla
The cosplayer’s dream material. Thermoplastics, in general, have been the greatest gift to cosplaying. With materials like Worbla, you can now mold pieces of armor or details out of plastic. No more sealing foam because it soaks up paint like a sponge, no more wrenching a heated sheet of foam over a bowl to make the perfect cup for a breast plate. With Worbla, it’s practically instantaneous in comparison.
You’ll notice that on one side, it kind of looks like a tortilla chip, and then the other side… still kind of looks like a tortilla chip, but really shiny. That’s because Worbla has an adhesive side. This is great for molding details out of it like clay or pressing it to itself in a “Worbla Sandwich”, which I’ll explain later. However once heated and stretched, Worbla, by itself, ends up being relatively thin which can result in tears if stressed.
Recently, the makers of this wonder material released two new thermoplastics to expand the line: TranspArt and Black Art. With TranspArt, you can now mold clear plastic, great for making custom visors or glowing jewels or flames. I’m most excited about Black Art as it enhances the already stellar properties of standard Worbla by taking on more precise details, having a smoother finish, and being more forgiving in molding larger pieces.
There’s two techniques she showed which I find get overlooked a lot, but are both very important tools to have in your arsenal.
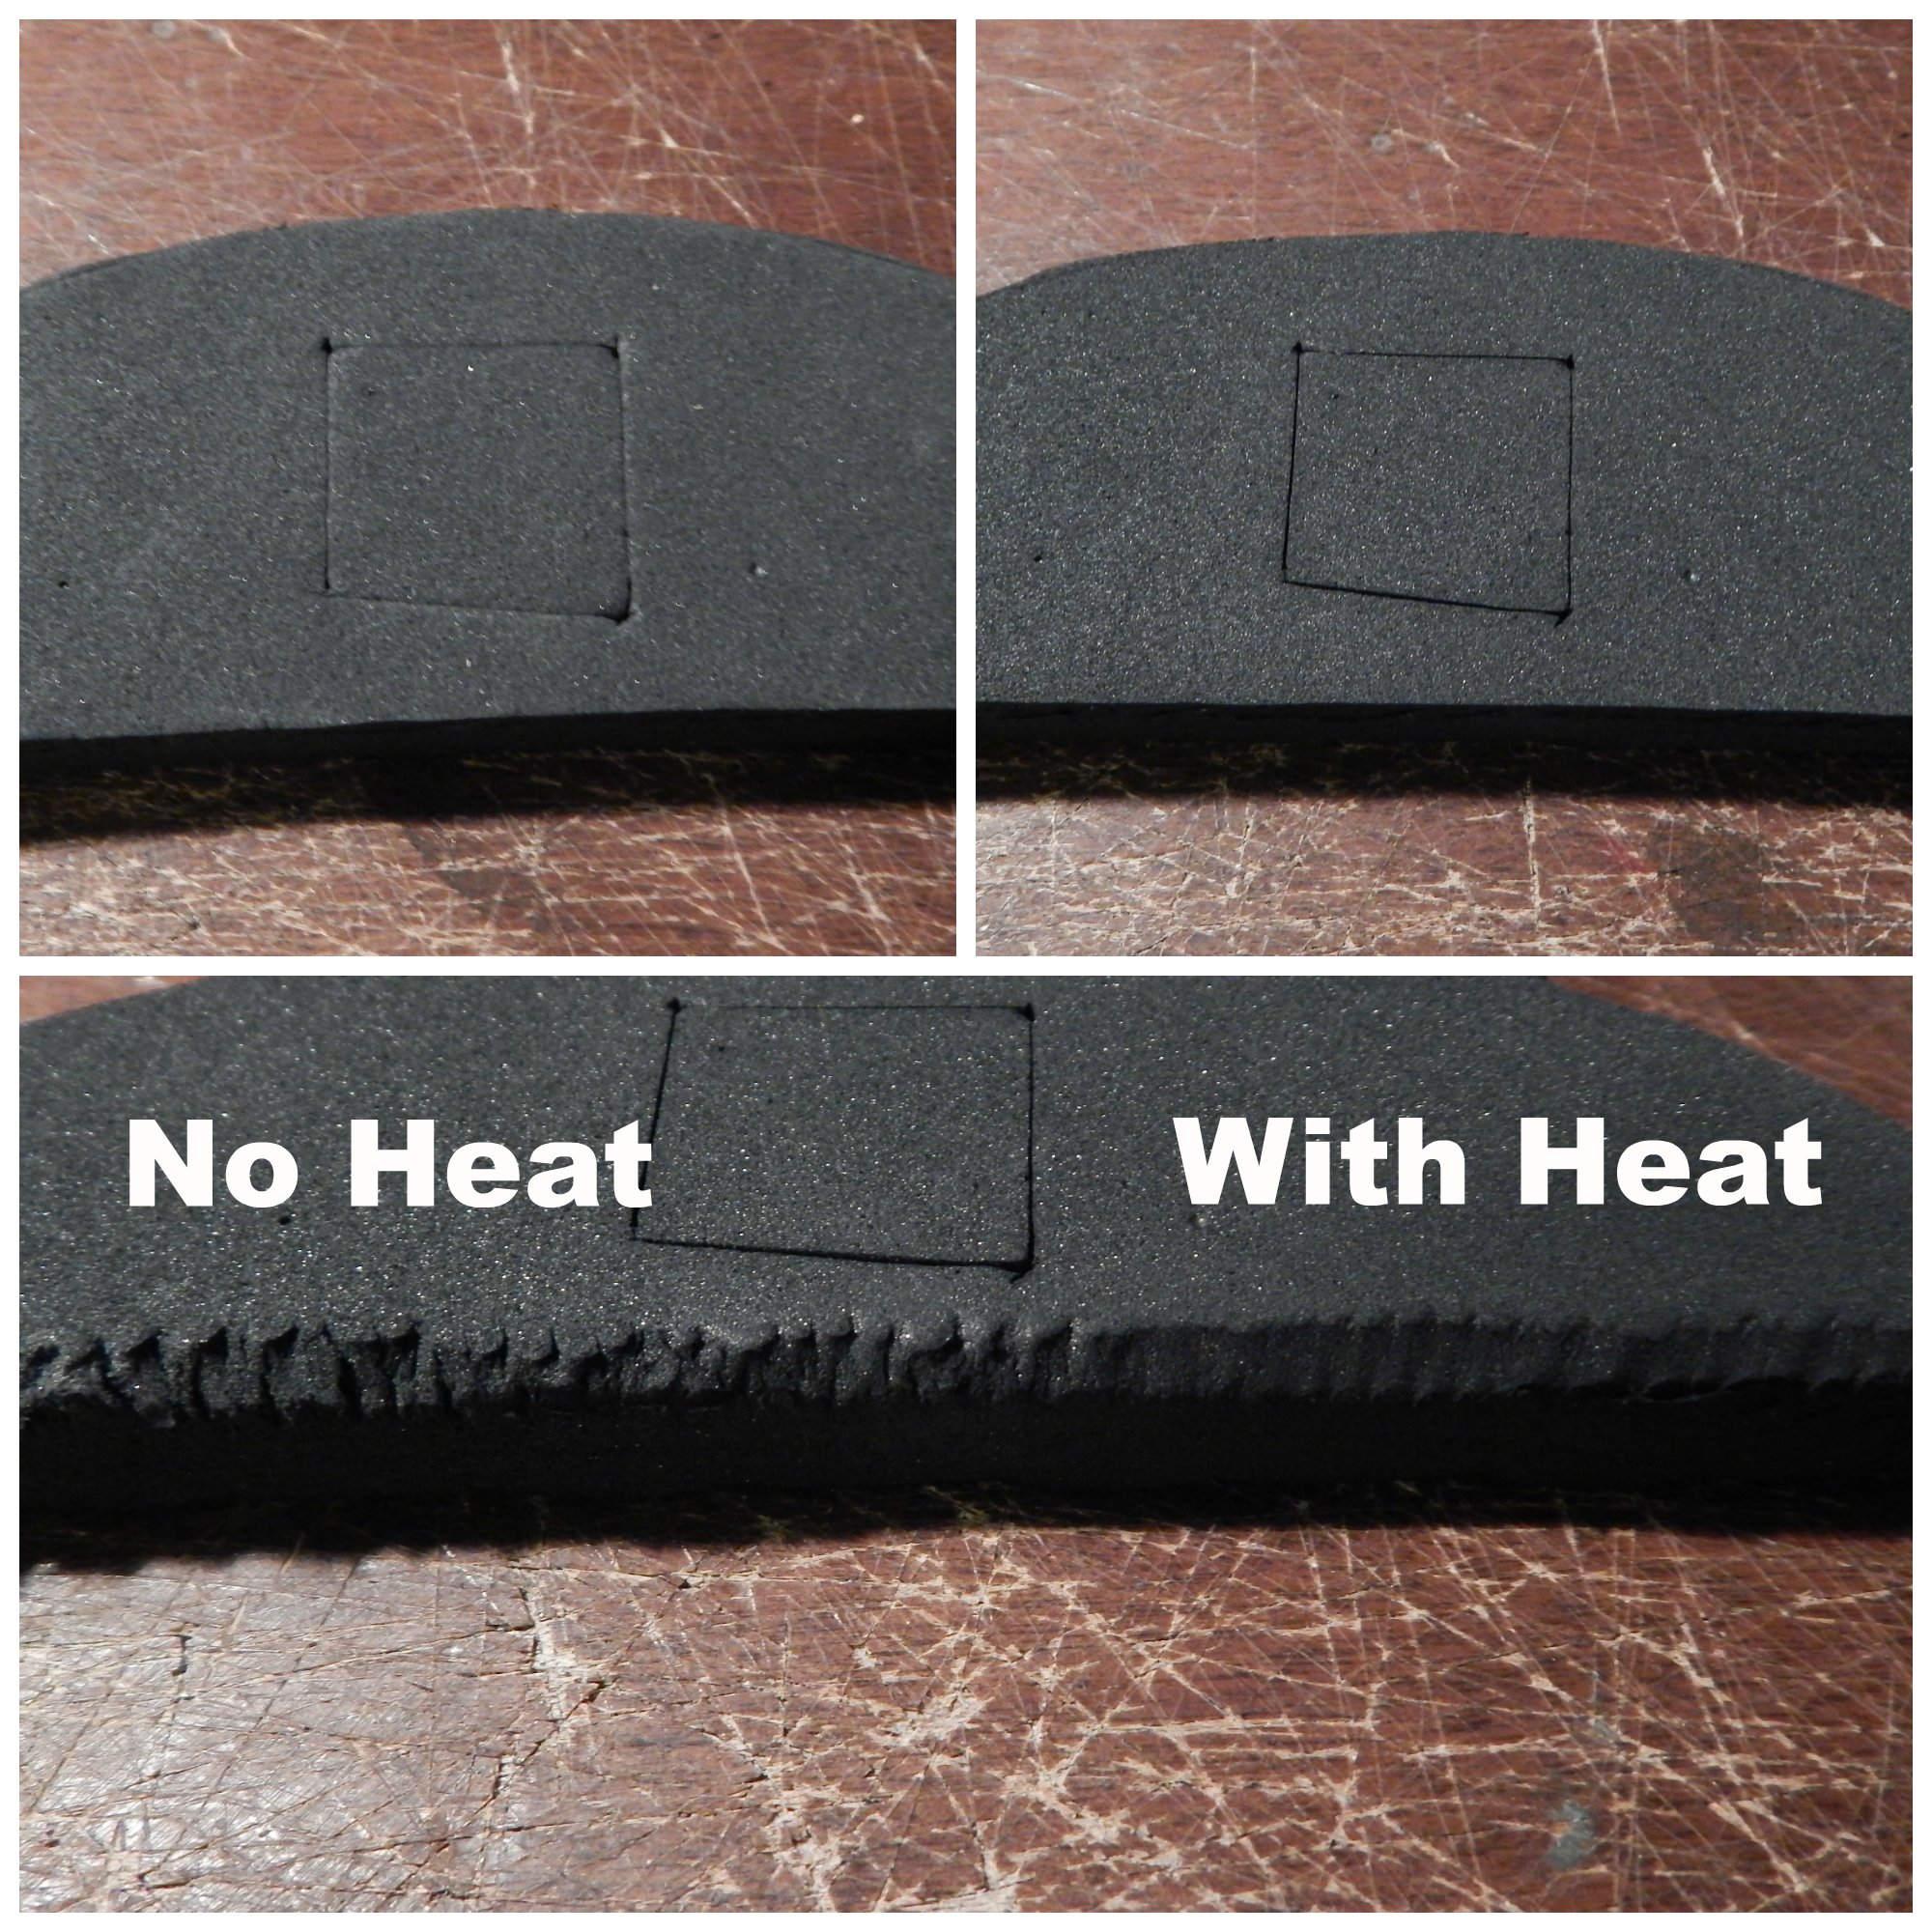
The first example is using heat on your foam. By heating your foam with a heat gun or even a hair dryer after making any cuts, it seals the foam and make it shrink the teeniest bit. This give you more prominent cut lines and helps to smooth rounded or beveled edges. You can see in the photo the edge of this EVA foam piece that I cut with a box cutter. I heat-treated part of it with a hair dryer (my heat gun is out on loan) to show you the difference it can make in smoothing even the most jagged of edges.
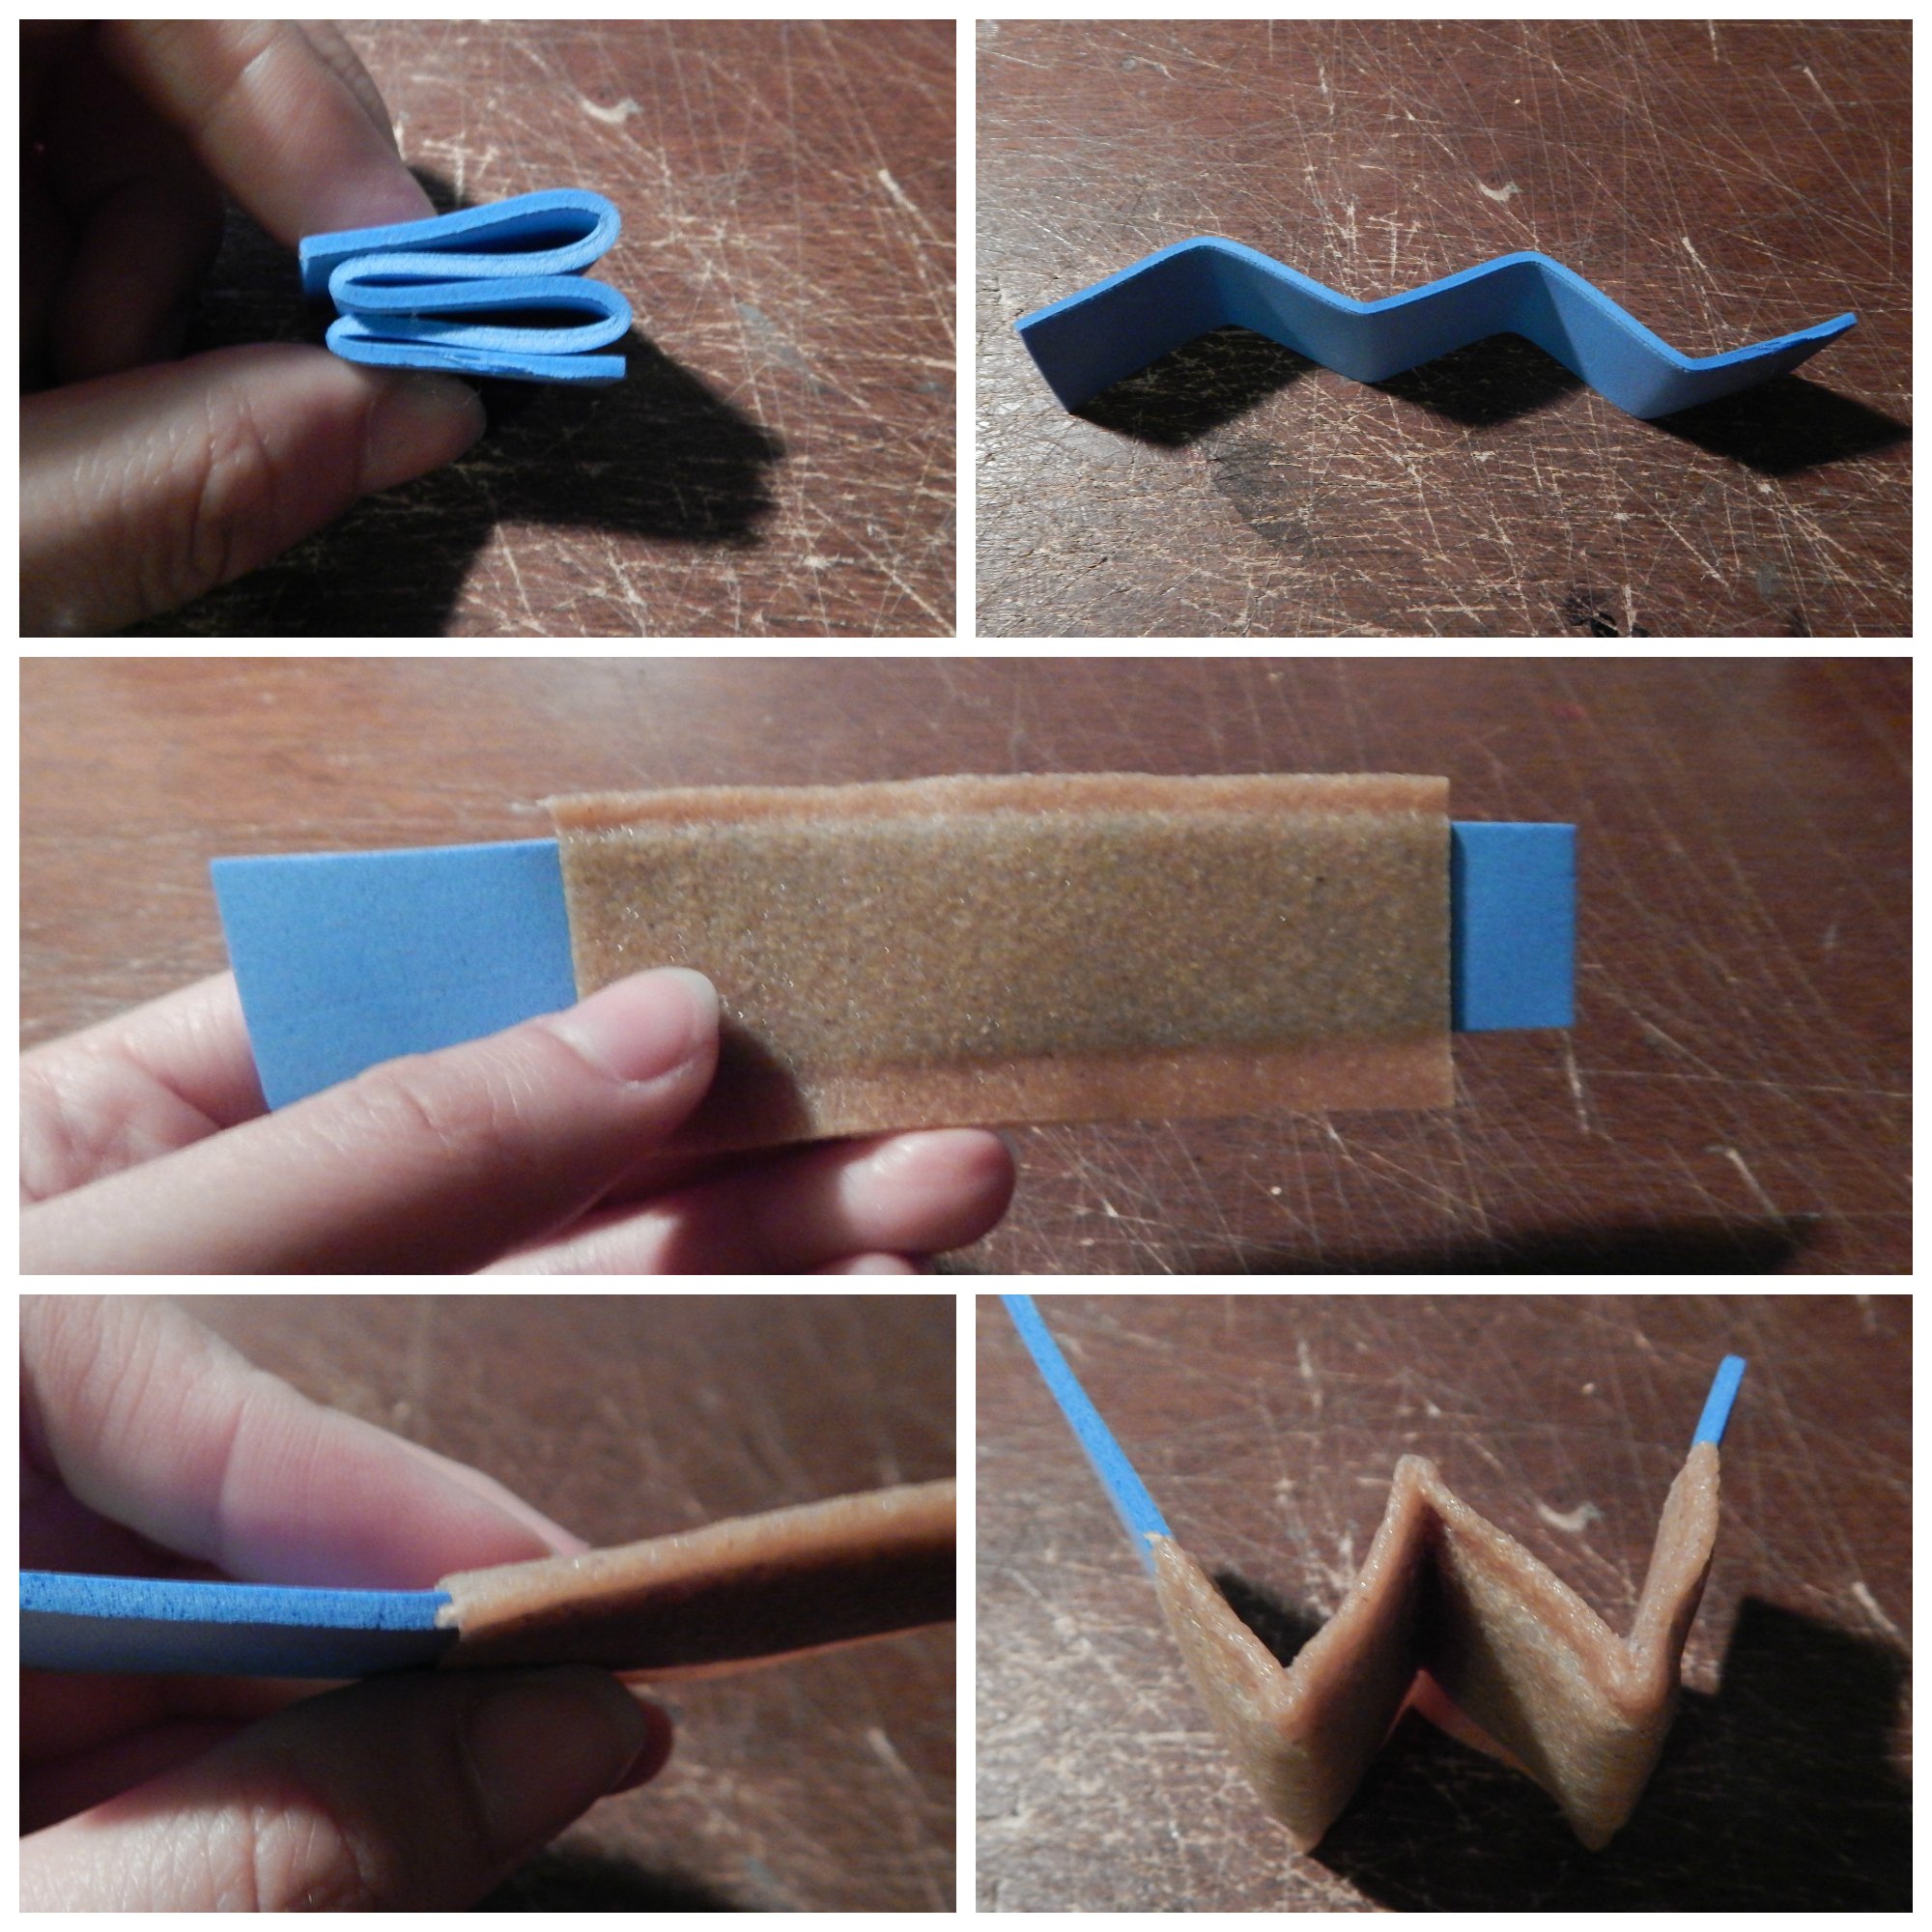
The second is one I mentioned earlier – what I like to call the “Worbla Sandwich” (although I don’t think I’m the only person to use this term) – is a method to give more rigidity to the 1/16th” craft foam, while not adding bulk. You can see I folded a strip of craft foam accordion-style and allowed it to settle. The zig-zag is visible, but not permanent, and the points are rounded. By sandwiching this strip of foam in between two layers of Worbla, you now have more rigidity without adding thickness to the piece. It now allows me to make an accordion fold that will stay permanently and the opportunity to make the points much sharper. This also helps artificially add thickness to the Worbla, helping to prevent the tearing I mentioned earlier.
It really baffled me to discover that this uber-famous cosplayer – touring around the world, making these beautiful costumes, doing these amazing photoshoots – is using the exact same supplies and techniques that I use in my own little workshop. It was completely eye-opening and had made my entire list of future projects seem so much more achievable and has been a big motivator to pushing me into my next big project.
Look forward to seeing these materials, techniques, and more (especially my first experience with Worbla Black Arts and TranspArt) in the months to come thanks to Jessica Nigri’s awesome video.
J. Tanooki is a Contributor for aybonline.com. She has been a lover of cosplay for over 10 years and regularly works on new and exciting cosplay projects. She actively posts about her cosplay plans, progress, and random shenanigans on her Facebook page, Twitter, and Instagram. Her opinion is her own.