The Oculus Rift and HTC Vive have been on the market for a little over a month now, but very few people have had the chance to try VR out for themselves. I’ve had my hands on both kits for the whole month, and I’ve realized that I enjoy sharing VR with people as much as I like using it myself. I’ve found myself hauling my Vive all over the place to show people the magic of VR. It’s not always practical to have everyone over to my house.
Last week I held a party to show VR to all my friends, but to do that I had to haul the hardware over to my mom’s place. The week before that, the AYBOnline staff got together for a meeting, and we had the Vive on demo so everyone on staff could get a taste. And this past Thursday, I brought the system over to my grandma’s place. Each time I transported the system, I put it back in the box it was shipped in, but that box is a little impractical to be carrying around all the time. Not to mention, it’s not exactly inconspicuous. I decided that a hard case would be the best option for transporting the system with a little more practicality.
To fit the Vive and all of its gear into one case, you need to purchase a fairly large container — at least a 22-inch box. A brand-name case like a Pelican will set you back hundreds of dollars, but there’s no reason to go that fancy. If you live in Canada, like myself, you have access to Princess Auto, which carries its own Power Fist brand of discount parts. A Pelican 1610, which is just big enough to do the trick, will set you back $400 or more, but the 22-inch Power Fist case is only $129. Americans can get a similar case from Monoprice.
The Power Fist hard case is impact-resistant, weatherproof, and features wheels and a handle that make toting the system around a breeze. Inside the case, you’ll find two layers of cube foam that let you pluck exactly the shape you need for your gear. The lid and the bottom of the case are lined with additional foam, so everything has a soft cushion on all sides.
The Vive’s Head-Mounted Display and the controllers are each too large to fit into one layer. I found that the best way to fit the headset in is to put the Vive in upside down and cut out the bottom layer to form around the head strap and body of the HMD. This section is form-fitting so that headset doesn’t move around. The long cable gets coiled up and placed on top of the headset. The upper section of cube foam was opened up above the HMD.
The controllers are both next to the Vive HMD. They also stick up beyond the top of the lower layer, but not enough to merit clearing out the foam right to the top. I decided to carve out just enough space for the controllers to slip into the bottom of the top layer.
The two lighthouse base stations ended up being the perfect fit for one layer of foam. I simply cut out a square that was the same size and they slipped right in. Next to the base stations I cut slits for the chargers for the two controllers and another space for the link box.
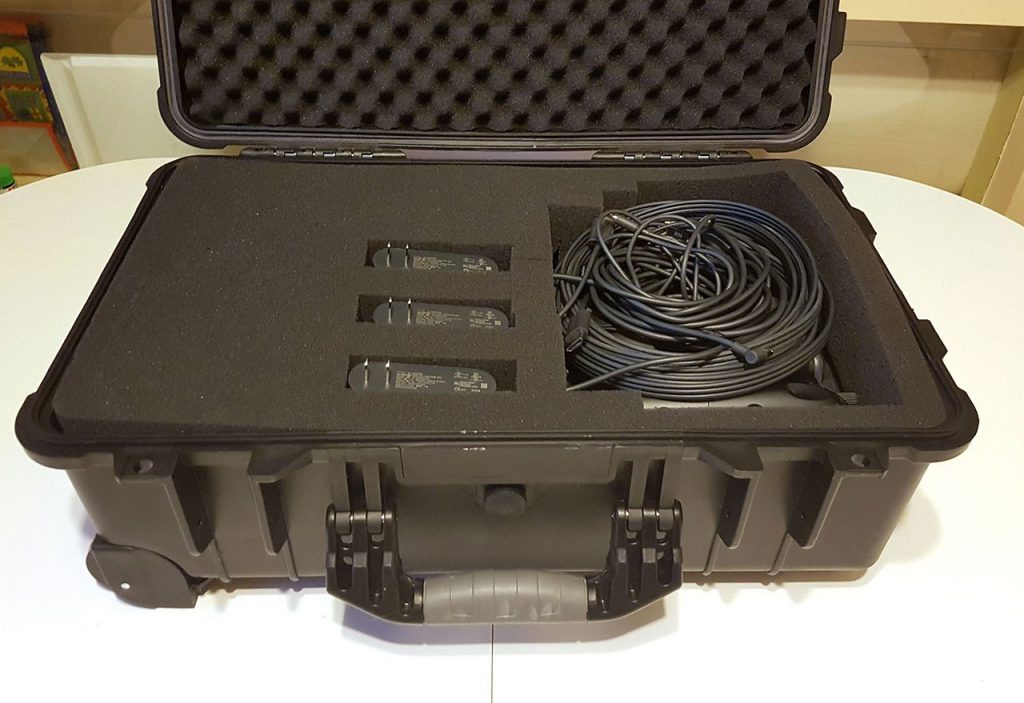
The top layer has a large cutout for the headset, and I also cut out three spaces to fit the power adapters for the base stations and the HMD. The cords for the power bricks, as well as the cables for the link box, get coiled up and placed inside the coiled-up headset cable.
I now have the perfect portable Vive box to go along with my portable tripod case. Now I just need a more portable computer to complete the package, and I can easily roam the city showing all of my friends the future.
If you’re coming to BaseLAN 29.5 next weekend, you can look forward to seeing the Vive there too.
Kevin Carbotte is Senior Editor, Hardware for AYBOnline.com. He knows a little about a lot, and a lot about a little. The opinions in his columns are his and his alone, but you are free to have them.


