Niantic Labs has recently released a soft launch of Pokemon GO, and while it was limited to Australia and Japan to begin with (and recently expanded to the USA), those like myself have downloaded APK’s for the game on Andriod and iOS. That said, I, and everyone else here at AYBOnline strongly encourage you to NOT download the APK, and wait for the full release. This is for your protection and mobile security, more so than anything else. We just like to be the ones on the front lines for you fine folks, so you don’t have to be.
With that out of the way, I’ll be your guide through some of the basics of the game that I’ve found out from my time with it, and help you to become a better GO Trainer!
First things first: Catching those damned Pokemon! It’s relatively easy; just hold your finger on the Pokeball, and swipe up towards the Pocket Monster. It’s rather particular though, so watch out for when they move, as that will mess up your shots (Zubat’s are just as annoying in Augmented Reality as they are in the core videogames).
You can also take note of the ring around the Pokemon, when you touch the Pokeball. You’ll also notice another ring inside of that one, which gets smaller, and then starts out large again. Depending on when you throw the ball, and how, you can get bonus EXP, but more on that later. All said, it’s still a crap shoot on how many Pokeballs you’ll actually end up spending, because it all depends on the rarity of the Pokemon you’re up against.
Another thing to note too, is that there will be little tufts of grass floating by every once in a while on screen, which will point out the general area a Pokemon will be in, so it makes it easier to track them down.
Second up is PokeSpots. These little devils pop up pretty well anywhere they see fit. I have one across the street from where I live, and Six or Seven more down the road. To get the fruits of these lovely things, you just need to spin the coin in the middle of the screen, which will give you some Pokeballs, and occasionally Eggs, and other goodies the higher your level. The exact quantity of drops from each Stop is based on what seems to be RNG, so you have to luck out. Fortunately, the refresh rate on Stops is about two to five minutes, so you can farm the Stops for a while.
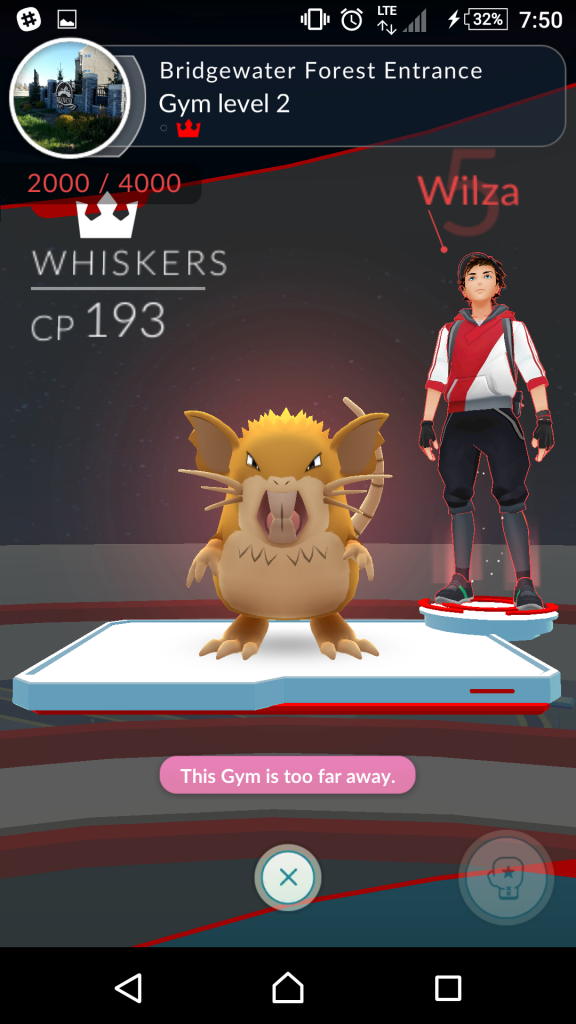
Gyms are up next, and kinda follow suit with PokeSpots, but arent quite the same. First and foremost, you need to be Trainer Level 5 to even think of trying to tackle one (again, more info on EXP below). When encountering a Pokemon Gym, you’ll find it in one of 2 states: Occupied, or Unoccupied. The latter of which is the easier to deal with, as you place one of your Pokemon into the gym, and it acts like the boss until either your teammates add theirs to the pile, or someone from an enemy team decides to attack.
Finding a gym that is already taken will trigger one of 2 things: If your team is holding onto the Gym, you can toss one of your Pokemon in there to help defend it. If you come upon another team’s Gym, you get the chance to attack it! When attacking a gym, the game goes from passive to active, meaning that you actually need to tap the screen to send out your attacks. This wasn’t made completely clear when I tried this out the first time, and almost lost my first Pokemon. So ProTip right there folks. Once a Gym is cleared of another team, it is then free for the taking, so be sure to drop one of your own Pokemon in it to claim it.
Leveling and Experience Points is our next topic of discussion, and it’s going to be a bit in depth, as there are 2 major parts to this.
The first is Trainer Level, which determines your PokeStop loot, and ability to join a team, and take Gyms. You progress by simply catching Pokemon, visiting PokeStops, and Gym Battles. Catching a new Pokemon will net you more XP than one you’ve caught before. You can also get bonus XP for doing trick throws, such as Curveballs, or for just timing the throw properly. These can be quite tricky to nail consistently, but it does add up over time.
Pokemon on the other hand, level differently than that of the core games on the Gameboy or 3DS than what you are used to. In order to make your Pokemon stronger, you need that particular Pokemon’s Candies, and Stardust. Stardust and candies are acquired through each catch you make, and you can get additional candies by sending extra Pokemon to the Professor. Stardust on the other hand it only acquired through catches.
You use a combination of Candies and Stardust to increase the CP of your Pokemon (which is a rating of how good it is in a very round about way), and it’s HP. You can also decide to save those Candies until you have enough to evolve your Pokemon, which also comes with a notable CP and Hit Point increase. So figure out what works best for you in regards to that to maximize your combat prowess!
So other than that, just hang tight to your back packs and Pokeballs, and wait for the official release of Pokemon GO!
Quinn Smith is a Contributor for AYBOnline. When he isn’t training his Pokemon, he’s trying to collect them all instead. His opinions are his own.


