It’s less than a month now, 4 weeks left, until I depart for Maryland and the workload is seemingly endless. But progress is being made and it won’t be long before the whole project really starts to take shape.
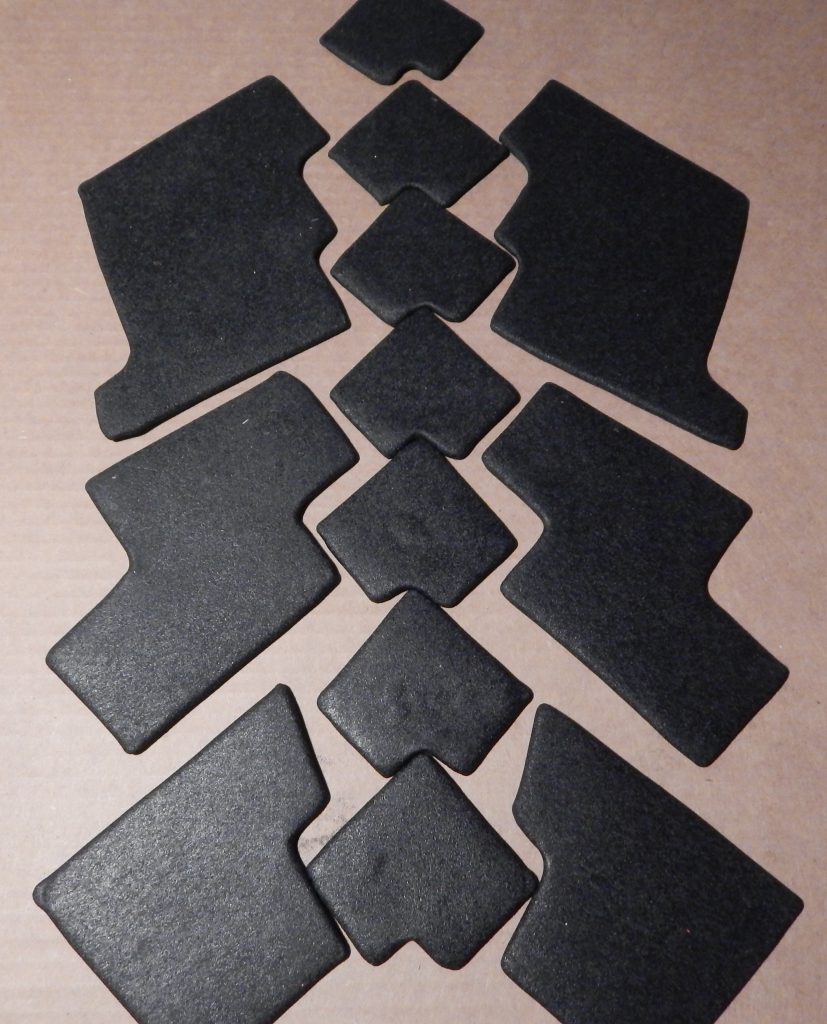
I last left you with the mock up of my torso armor made on a duct tape cast of my body. Well needless to say it’s doesn’t look much like a body anymore. The cast has been cut apart into key areas of the armor:
- The upper chest
- The bust
- The left and right ribs
- And the back
By splitting these area up, we can keep our focus directed and avoid some confusion when re-assembling all the components to adhere to my base suit, which I’ll touch on later.
So what exactly is the armor being made of?
If you happened to catch my article breaking down some of the techniques Jessica Nigri used to make her Deathwing cosplay, you may have seen me use a technique I called a “Worbla Sandwich”. Well that’s very similar to how the armor for this costume is being made as I require all of the pieces to be thin, somewhat flexible, durable, and form fitting. However instead of fully encasing the craft foam in Worbla, we’re going with more of an open-faced sandwich, covering only one side fully and wrapping the edges to hold the foam in place. The reasoning behind this is to get good adhesion between the armor and the base suit since both materials are porous, unlike the Worbla. So far, all of the base pieces of the back and the upper chest have been completed and will wait for some shaping adjustments and detailing.
You might notice I’m not using the standard, tortilla chip styled Worbla. I’m using a different kind of Worbla called BlackArts. After seeing the differences between the standard Worbla and the BlackArts, I felt the BlackArts was a much better option, especially considering there was no difference in price or quantity from the source I purchased from. The biggest differences between the two types are:
Texture – The standard Worbla does indeed look like a tortilla chip, both in colour and in it’s rough, bumpy texture. The BlackArts is even in colour, but has a much smoother surface. This makes it easier for finishing and painting, as there’s little to no filling or sanding required.
Durability – While both materials are certainly not tear resistant and can be torn with a mild amount of hand strength, the BlackArts requires a bit more force to tear. And while the standard Worbla, if stretched too thin, can begin to separate entirely, the BlackArts seems to stretch quite a bit farther without separating.
Shaping – The BlackArts has made major improvements in this areas, which is probably the most important as it’s probably the main reason you bought a Worbla product in the first place. Since the texture is a lot finer and smoother, you can mold and shape the product into much more precise and intricate details than what you can achieve with standard Worbla. The BlackArts is also a lot more forgiving for creating smooth rounded edges in places where the standard may tend to ripple.
For my base suit, I happened to have an unused black zentai suit kick around and decided it would be a great base to alter to an unrecognizable design and use to attach my armor to since I need it to be so form fitting. I’ve gone ahead and removed the arms and legs since I won’t be needing either of them, but there’s still more alterations to come for the final design. I’ve also destroyed a bra as a base for my breastplate.
There’s still plenty more work to be done and I also still have a few things in the mail that, thankfully, don’t need to be altered significantly and will be pretty much used as is. Look forward to my continued progress update over the next few weeks as I continue more work on this beast for MAGFest.
J. Tanooki is a Contributor for AllYourBaseOnline.com. She has been a lover of cosplay for over 10 years and regularly works on new and exciting cosplay projects. She actively posts about her cosplay plans, progress, and random shenanigans on her Facebook page, Twitter, and Instagram. Her opinion is her own.


