Test Method
Our philosophy when it comes to graphics card testing is simple. We want to show the experience an average gamer will get from their hardware. Most gamers would rather start their game and go, rather than spend the next 2 hours find the difference in performance between subtle settings, and that’s why we believe GeForce Experience is an excellent tool.
For this reason, with Nvidia based graphics cards we’ll be using the recommended settings in GeForce Experience to do our tests, as we feel most gamers will be using this feature for the convenience.
Testing will be done in 2 categories: Real Gameplay using Battlefield 4, FarCry 4, Tomb Raider and Grid Autosport, in which average framerate is calculated with Fraps using a 300 second benchmark, and Synthetic Benchmarks, featuring tests in 3DMark, FurMark and Catzilla, as well as the benchmark tests within Tomb Raider and Grid Autosport.
Since overclocking is something most people will do, we’ll run each set of tests with stock settings, with the GPU overlocked, and with the GPU and memory both overclocked.
Power draw will be recorded with a Kill-a-watt for each scenario at idle, and at load using a Kill-a-watt.
Test System
All testing is done on the same computer. For the motherboard we have an Asus Z87-WS with an Intel Core i5-4670K and 2x4GB Corsair Vengeance Pro DDR3-1600. Windows 7 is installed on a Sandisk 128GB SSD and games are installed on a second Sandisk 128GB SSD. Powering the system is a Corsair RM850 modular power supply.
Overclocking
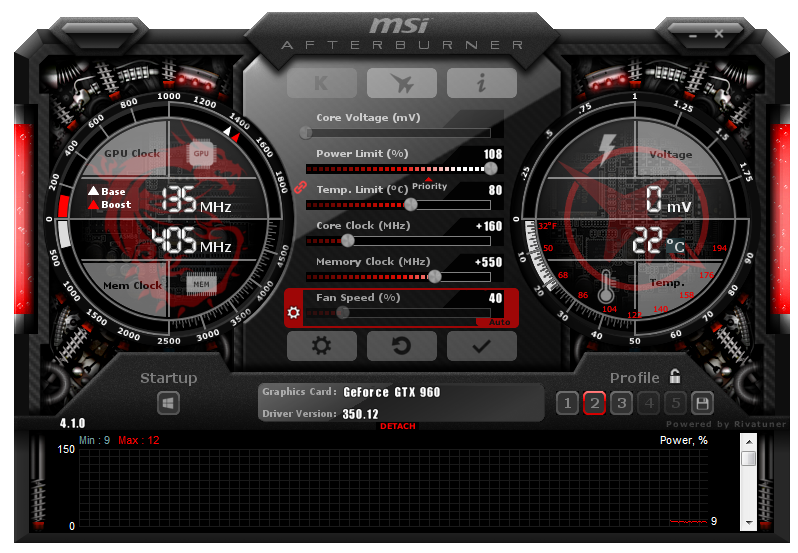
MSI has been providing one of the leading GPU overclocking utilities for years now. MSI afterburner is fairly similar to the competition, providing direct access to many parameters of the graphics card. GPU Boost Clock, Power Target, Memory Clock are the most commonly used, however there are a number of other options that can be adjusted. This evaluation will focus on these three categories.
Anyone who’s overclocked a recent Nvidia GPU would know that the first thing to do is ramp up the power target. This particular model allowed for an 8% increase in power delivery, and in fact had an appreciable improvement in 3DMark, however no noticeable difference in real games were observed.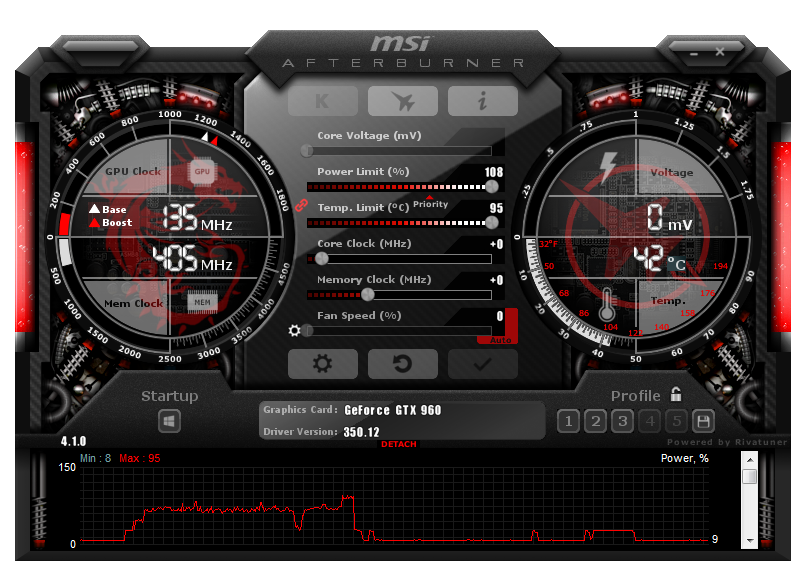
Next the GPU Boost clock was adjusted. Going up in small 10Mhz increments, we were able to increase the boost clock up by 160Mhz. Anything more was completely unstable.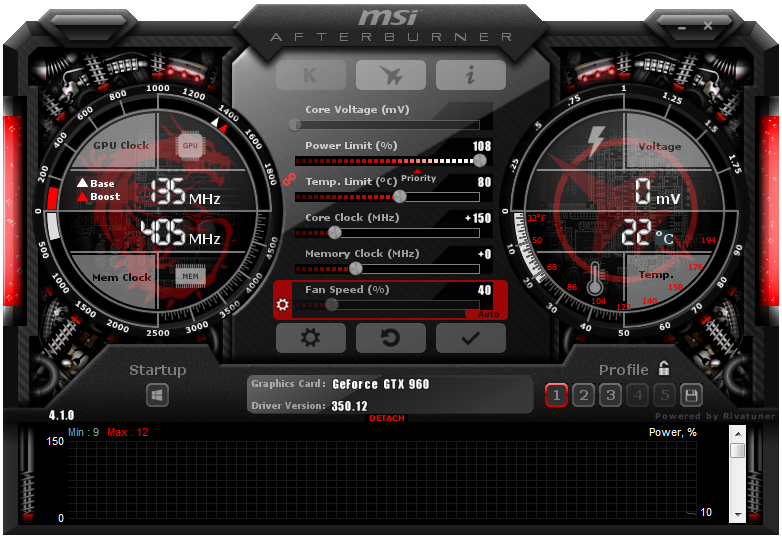
Memory turned out to be quite a bit more forgiving. Increases of 30Mhz at a time became a tedious process, however it’s not worth cutting corners and risking expensive hardware. It took some doing, but the maximum of +550 Mhz was reached. 3DMark would not complete at any higher level